Lab 4 - Supervisor Desktop
Last modified: Tue, 24 Oct 2023
Table of Contents
| Topic | Lab Type | Difficulty Level | Estimated length | |
|---|---|---|---|---|
| Assign supervisor license to the user | Practical Lab | EASY | 5 min | |
| Configure supervisor in Management Portal | Practical Lab | EASY | 10 min | |
| Supervisor Experience | Practical Lab | EASY | 15 min |
Introduction
Lab Objective
This lab is designed to introduce the audience to the Extensible Supervisor Desktop (ESD), its configuration and capabilities. In addition this lab contains demo which shows user experience when working with ESD.
Pre-requisite
- Admin credentials for sign-in to Control Hub.
- At least one admin and one supervisor user with extensions have been created on Control Hub according to the instructions provided in Lab 1 - Admin Experience.
- Standard or Premium agent license is assigned to the agent’s account on Control Hub.
- The agent account is configured on the Webex CC management portal and you are able to sign in as an agent.
Example of agent and supervisor users on Control Hub
| User Role | User email | Endpoint |
|---|---|---|
| Agent | wxcclabs+agent_ |
WebRTC |
| Supervisor | wxcclabs+supvr_ |
Webex App |
Note: Please refer Lab 1 - Admin Experience if you need to add agent or supervisor users on Control Hub.
Quick Links
Control Hub: https://admin.webex.com
Webex CC Management Portal: https://portal.wxcc-us1.cisco.com/portal
Agent / Supervisor Desktop: https://desktop.wxcc-us1.cisco.com
Assign supervisor license to the user
- Login to Control Hub under the organization admin account.
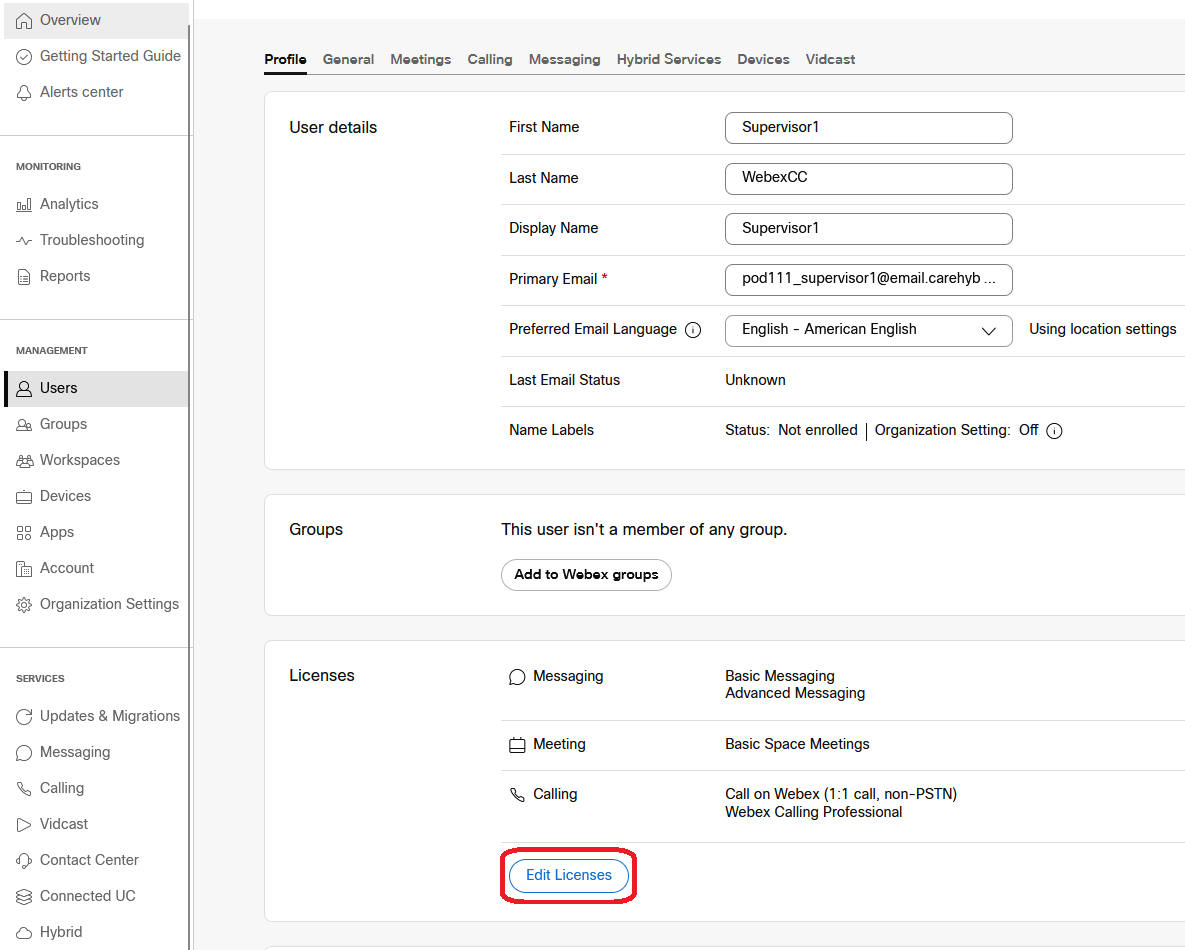
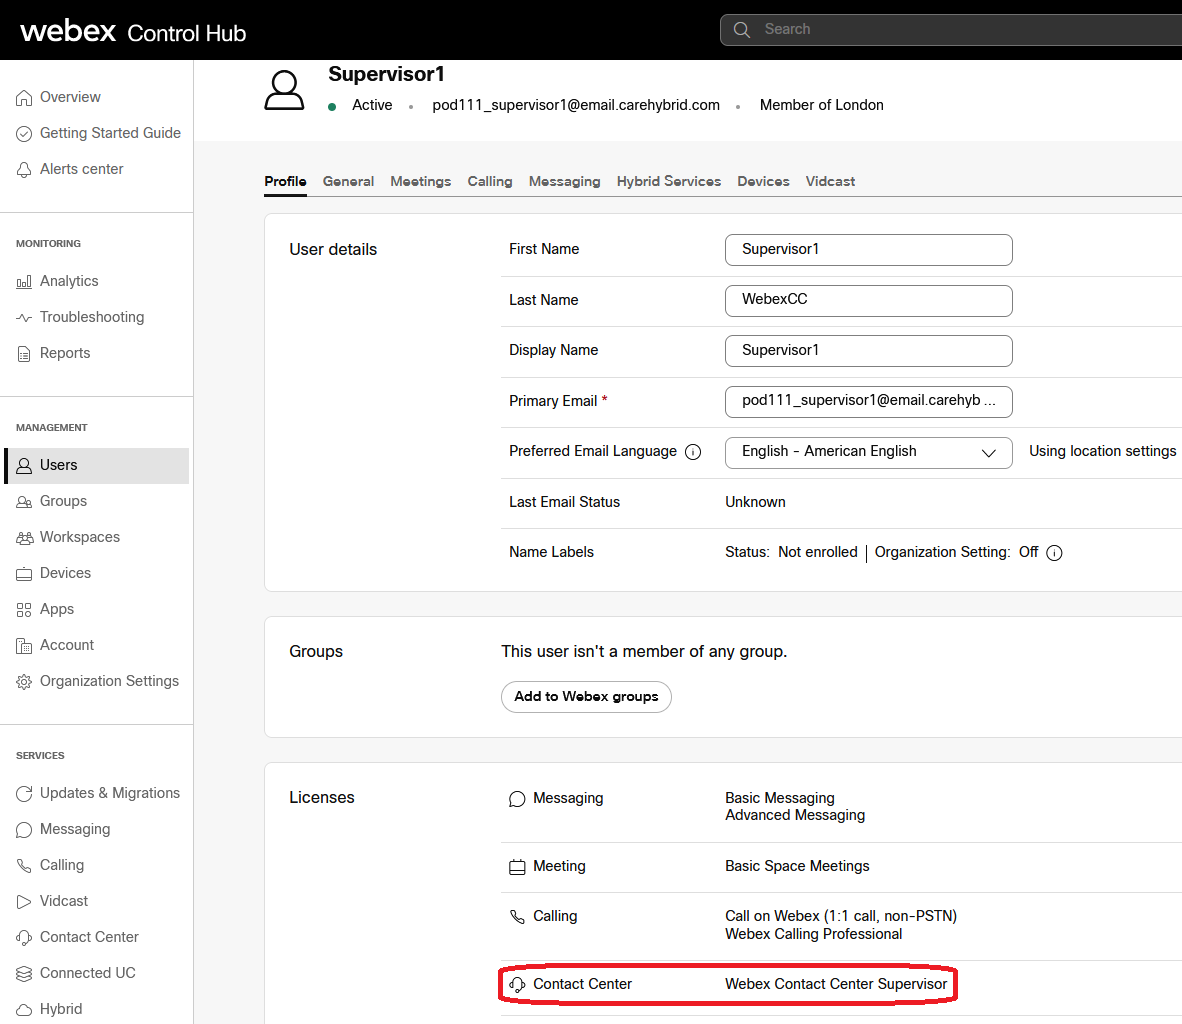
- Go to Users, click on supervisor’s account, scroll dow to Licenses section and press Edit Licenses button.
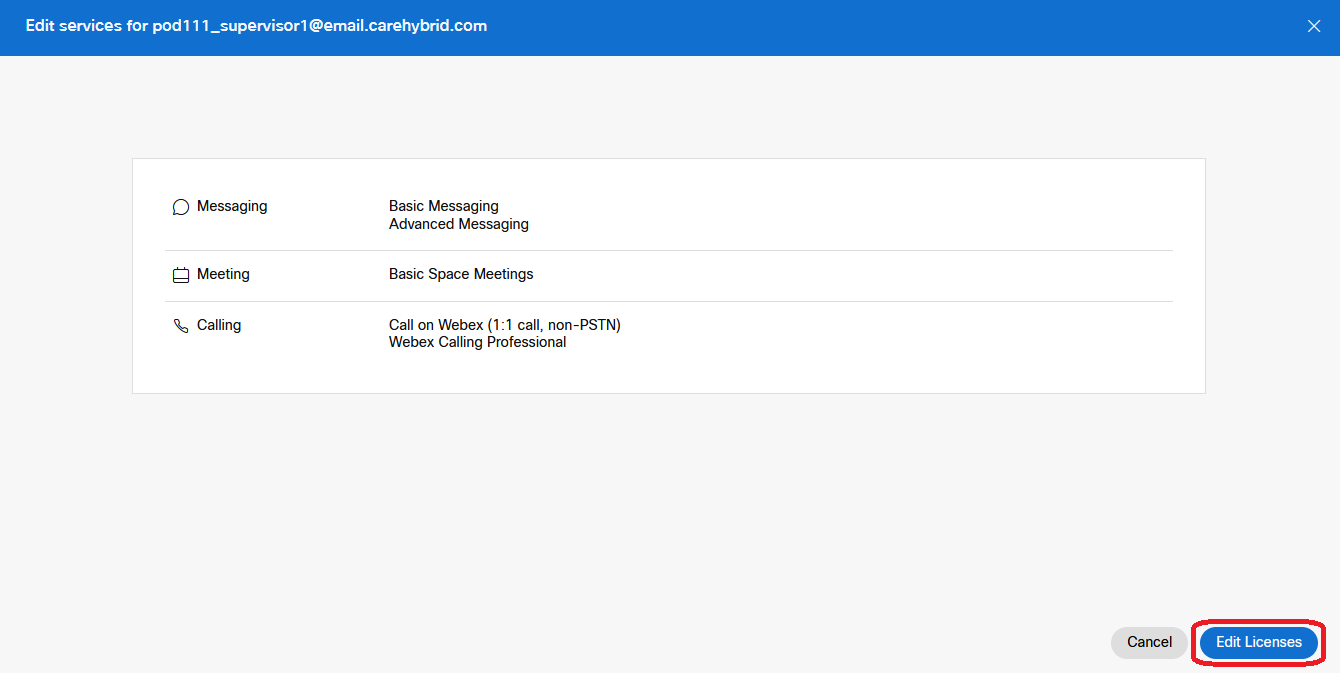
- Press Edit Licenses button on Edit services page.
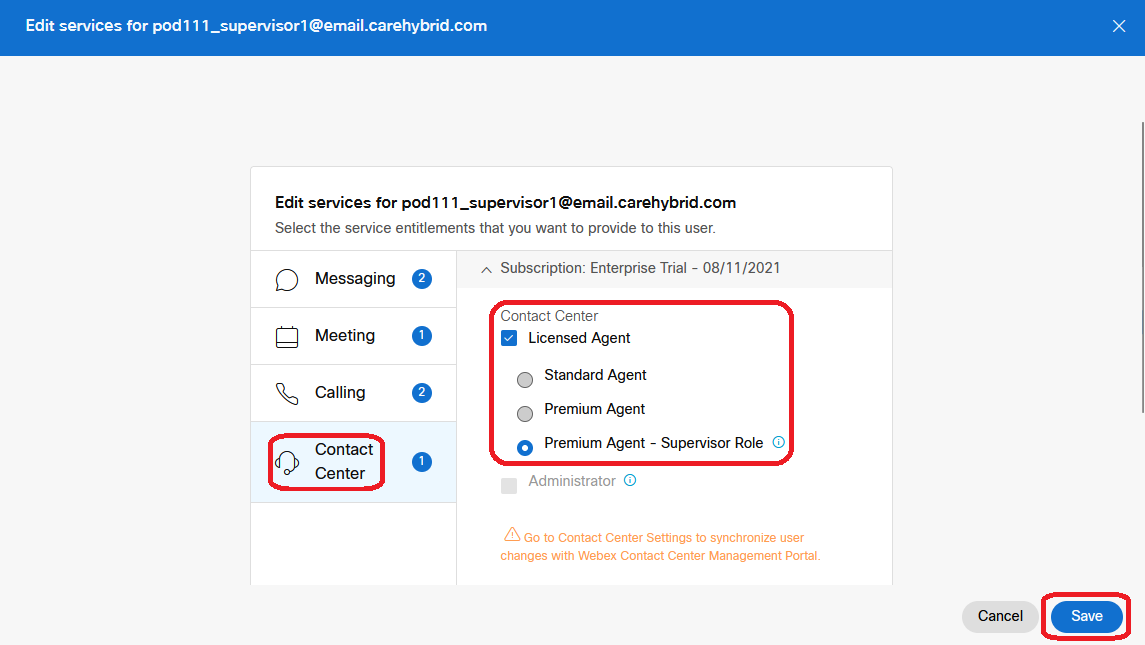
- Go to Contact Center tab, tick Licenses Agent checkbox and assign Premium Agent - Supervisor Role license. Then save changes.
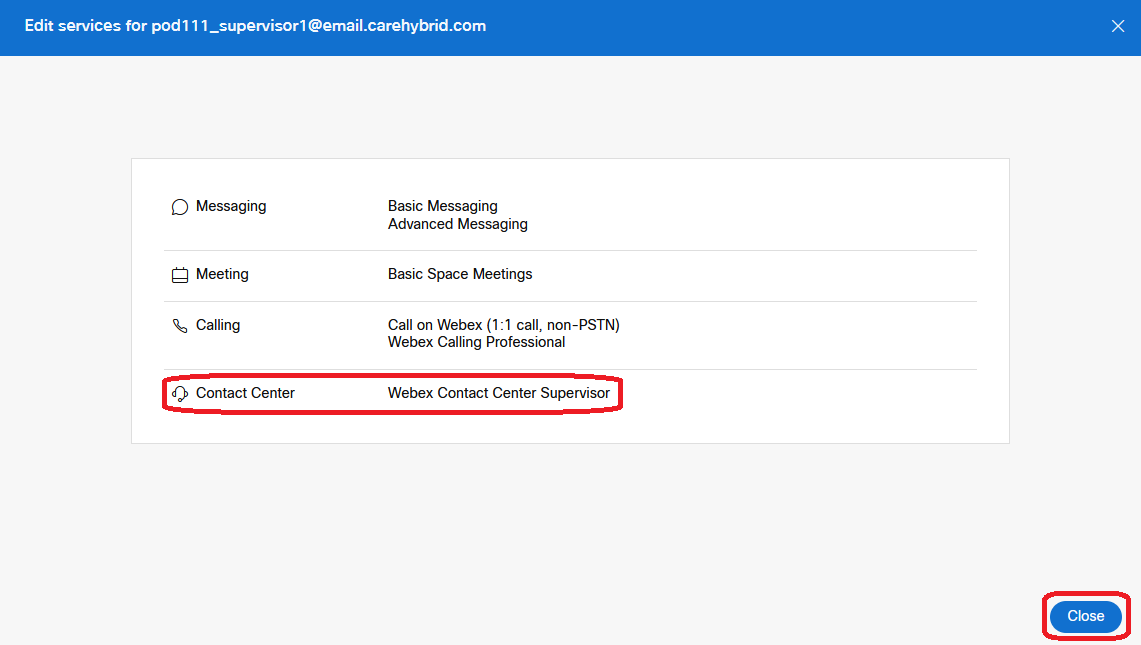
- Check and make sure supervisor license has been assigned. Then click on Close button to return to the user settings.
- Check and make sure supervisor license is displayed in Licenses section of user seetings on Control Hub.
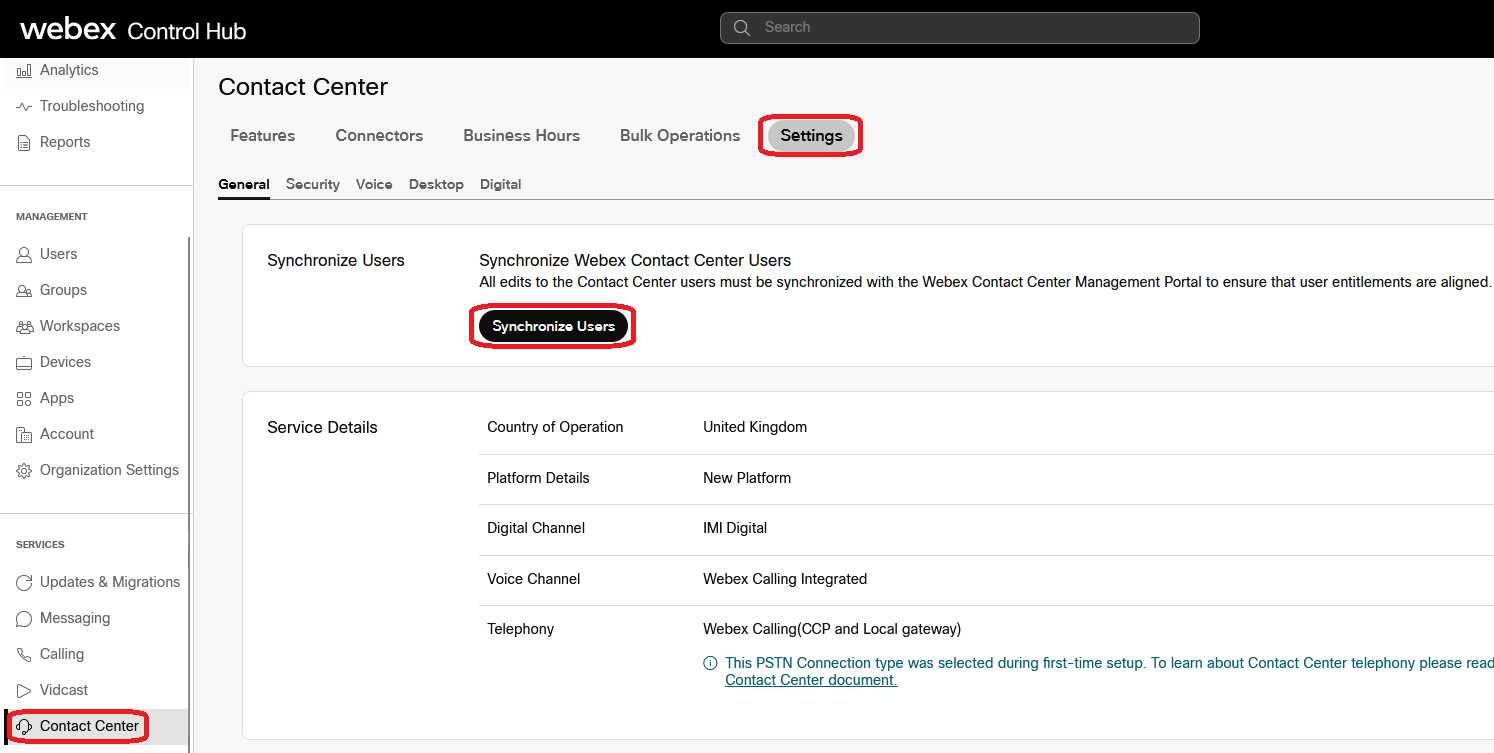
- Go to Contact Center -> Settings and press Synchronize Users button to sync all changes from Control Hub to Webex CC Management Portal.
Configure supervisor in the Management Portal
-
Download the latest Supervisor Desktop Layout JSON file with Call Recordings feature.
-
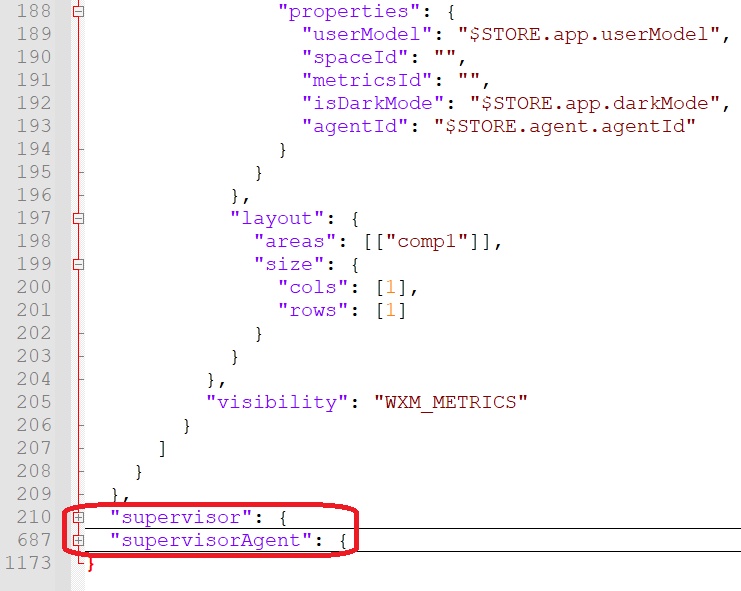
Open the file in any JSON editor, check, and make sure it contains supervisor and supervisorAgent sections.
- supervisor section is used when the user signs in to supervisor desktop with Supervisor role.
- supervisorAdmin section is used when the user signs in to supervisor desktop with Supervisor and Agent role.
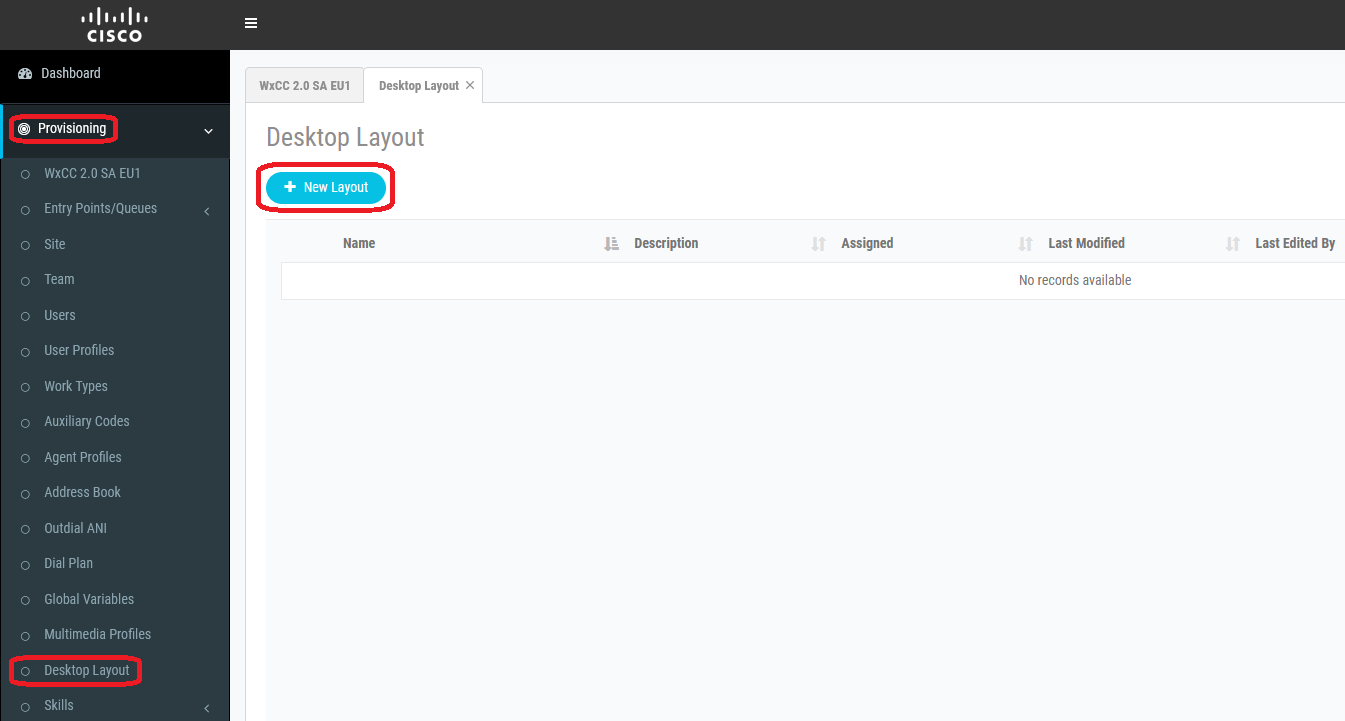
- Go to Provisioning -> Desktop Layout and click on New Layout.
- Provide Name, press Upload button and select JSON layout file downloaded above. After the file is uploaded check and make sure the validation is completed successfully and save desktop layout.

- Go to Provisioning -> Teams and click on New Team.
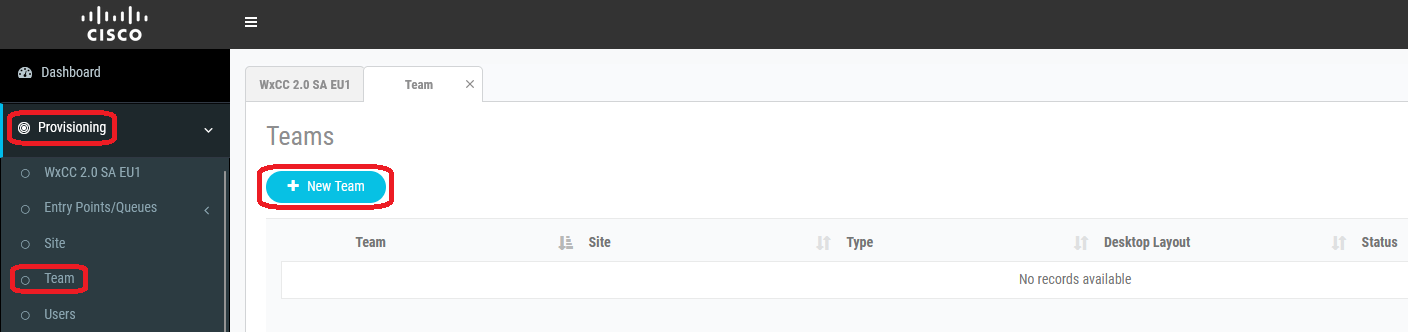
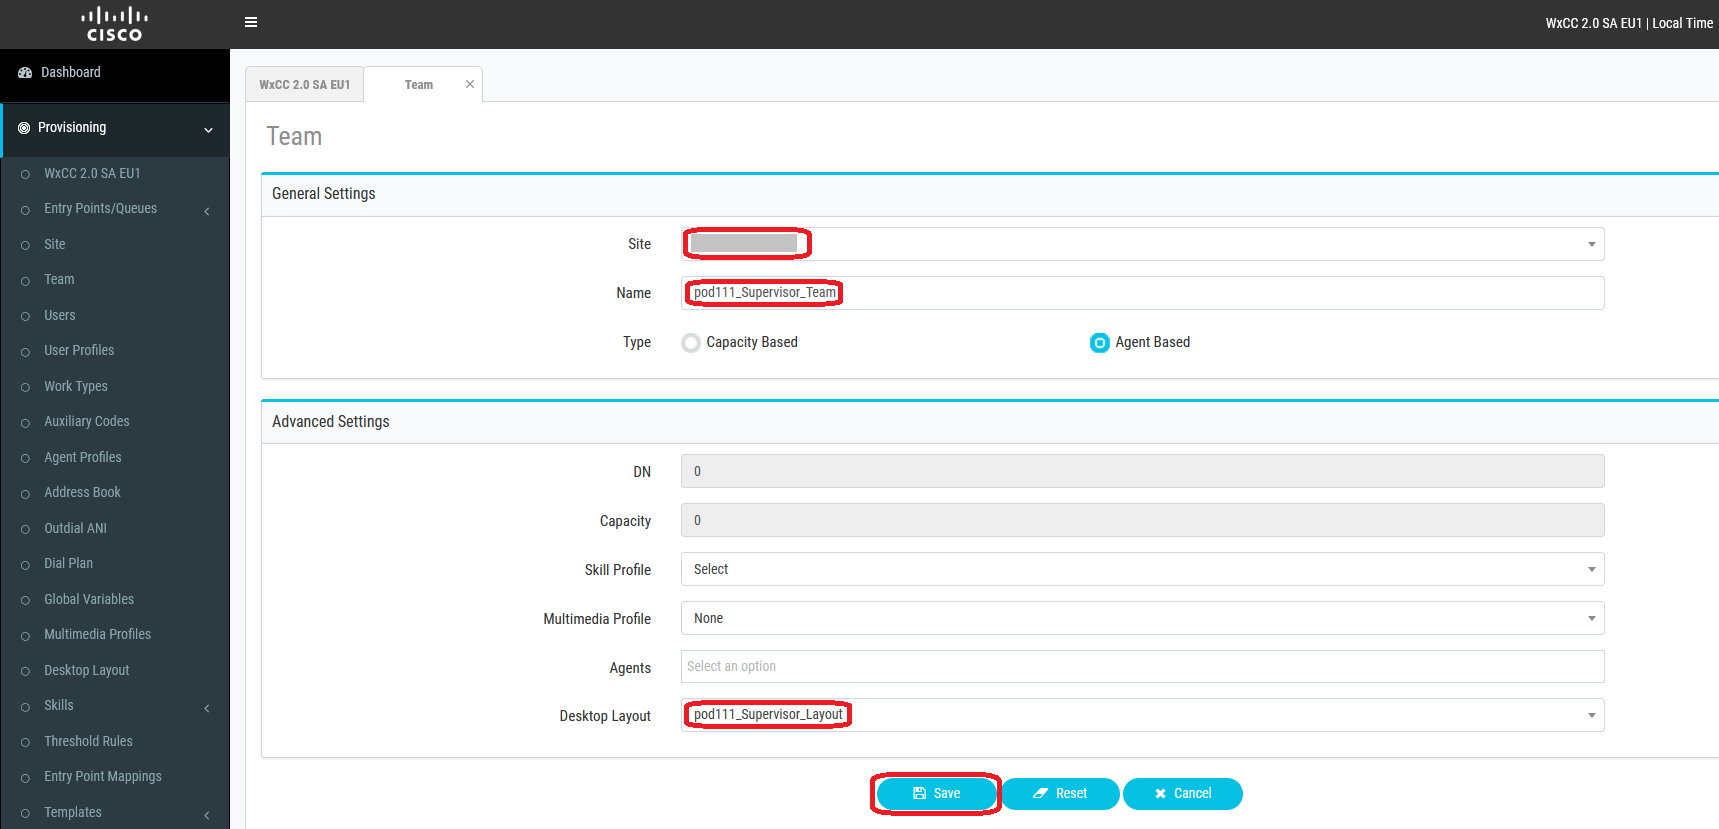
- Choose the proper Site from the drop-down list according to the lab guide, provide Name, select Desktop Layout for the supervisor created at the previous step, and save the team.
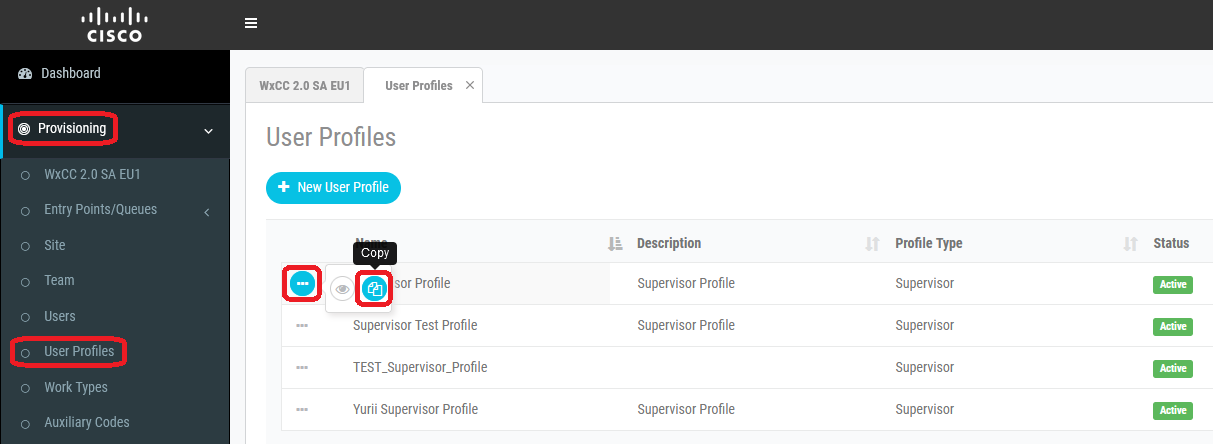
- Go to Provisioning -> User Profiles, find default Supervisor Profile, click on … button next to it, then on Copy.
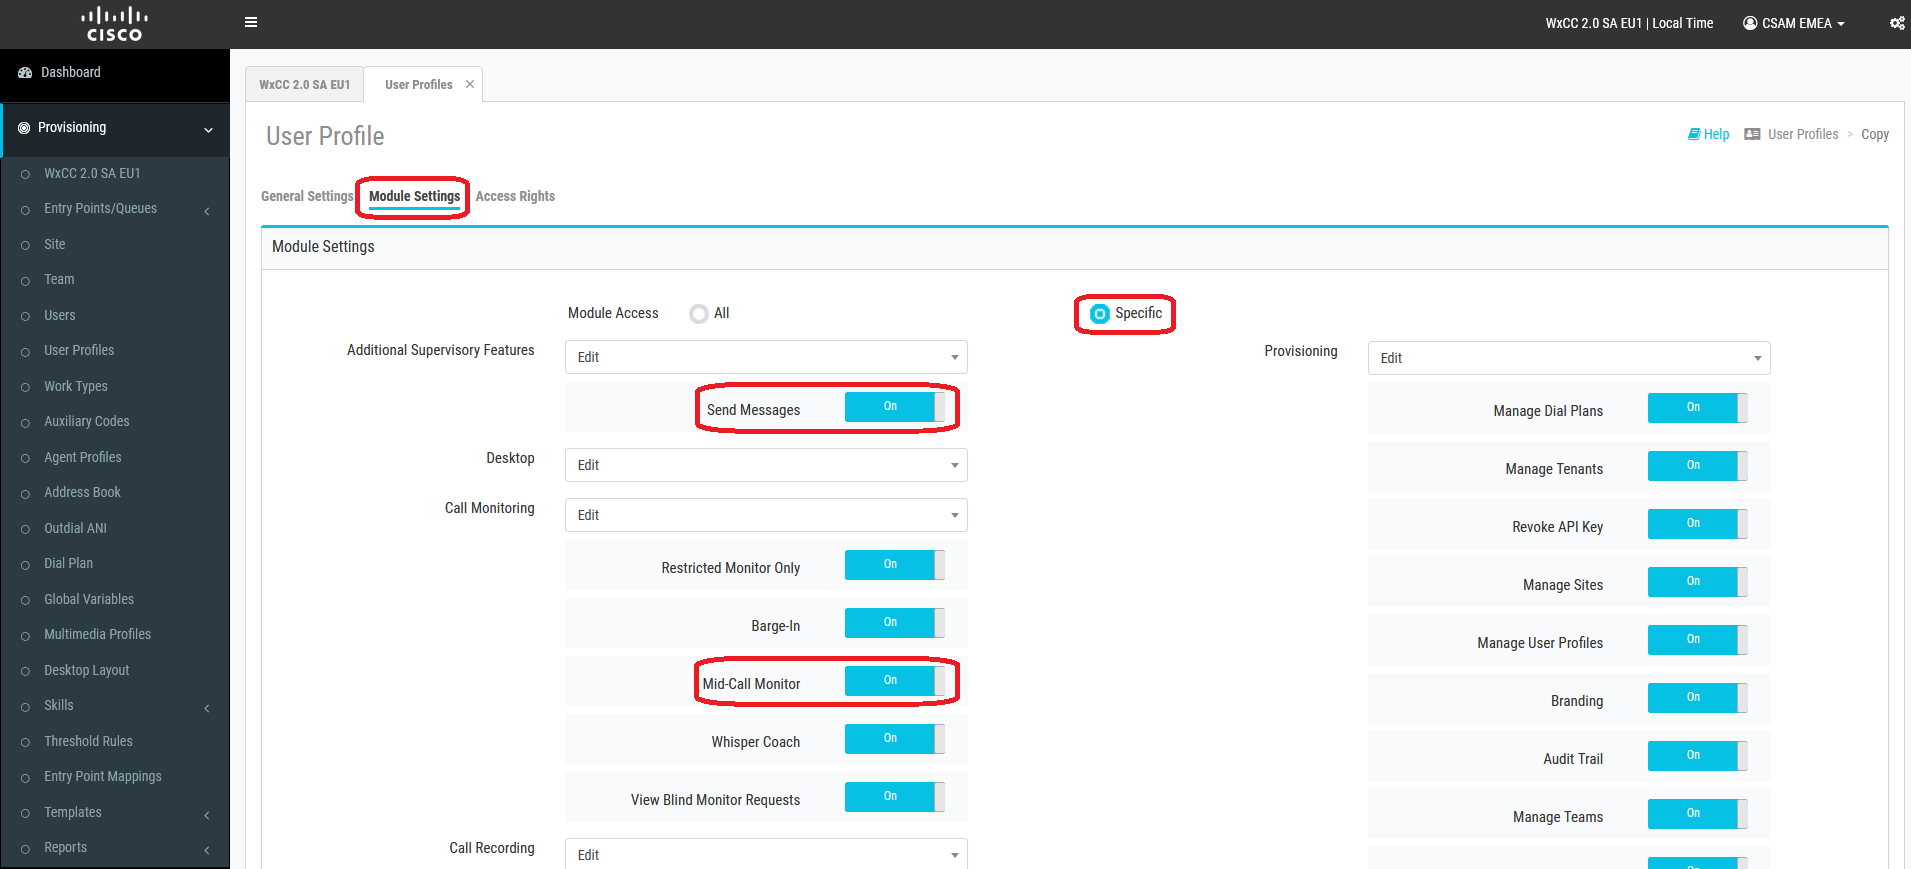
- Provide the proper user profile name and go to the Module Settings tab.
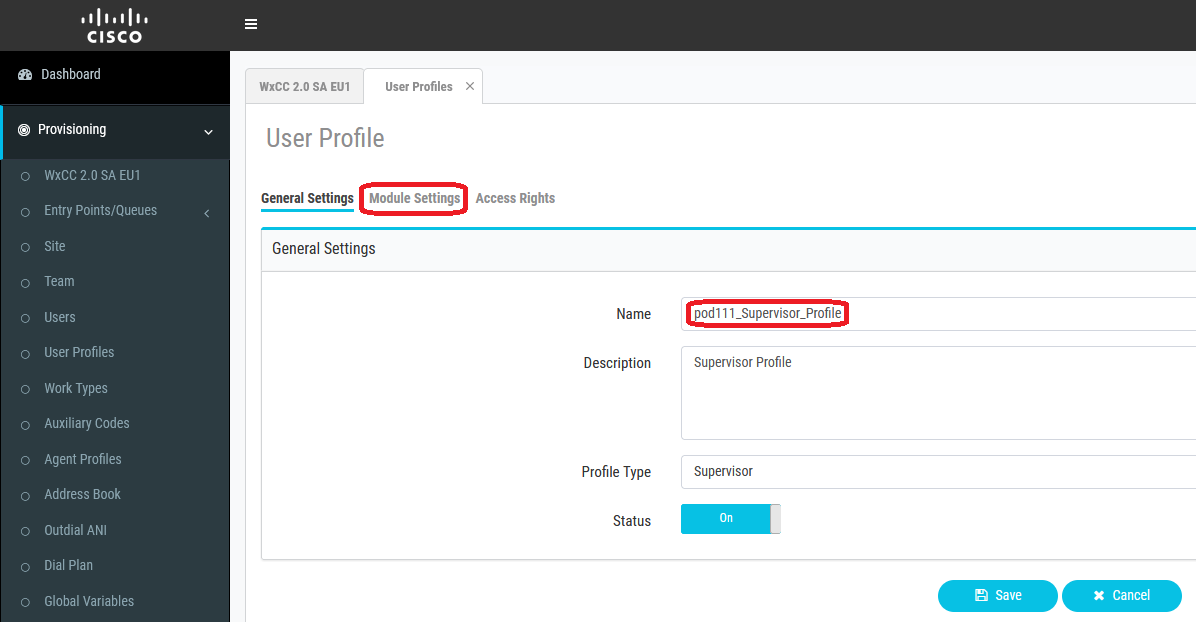
- Select Module Access as Specific. Check and make sure Send Messages and Mid-Call Monitor capabilities are enabled.
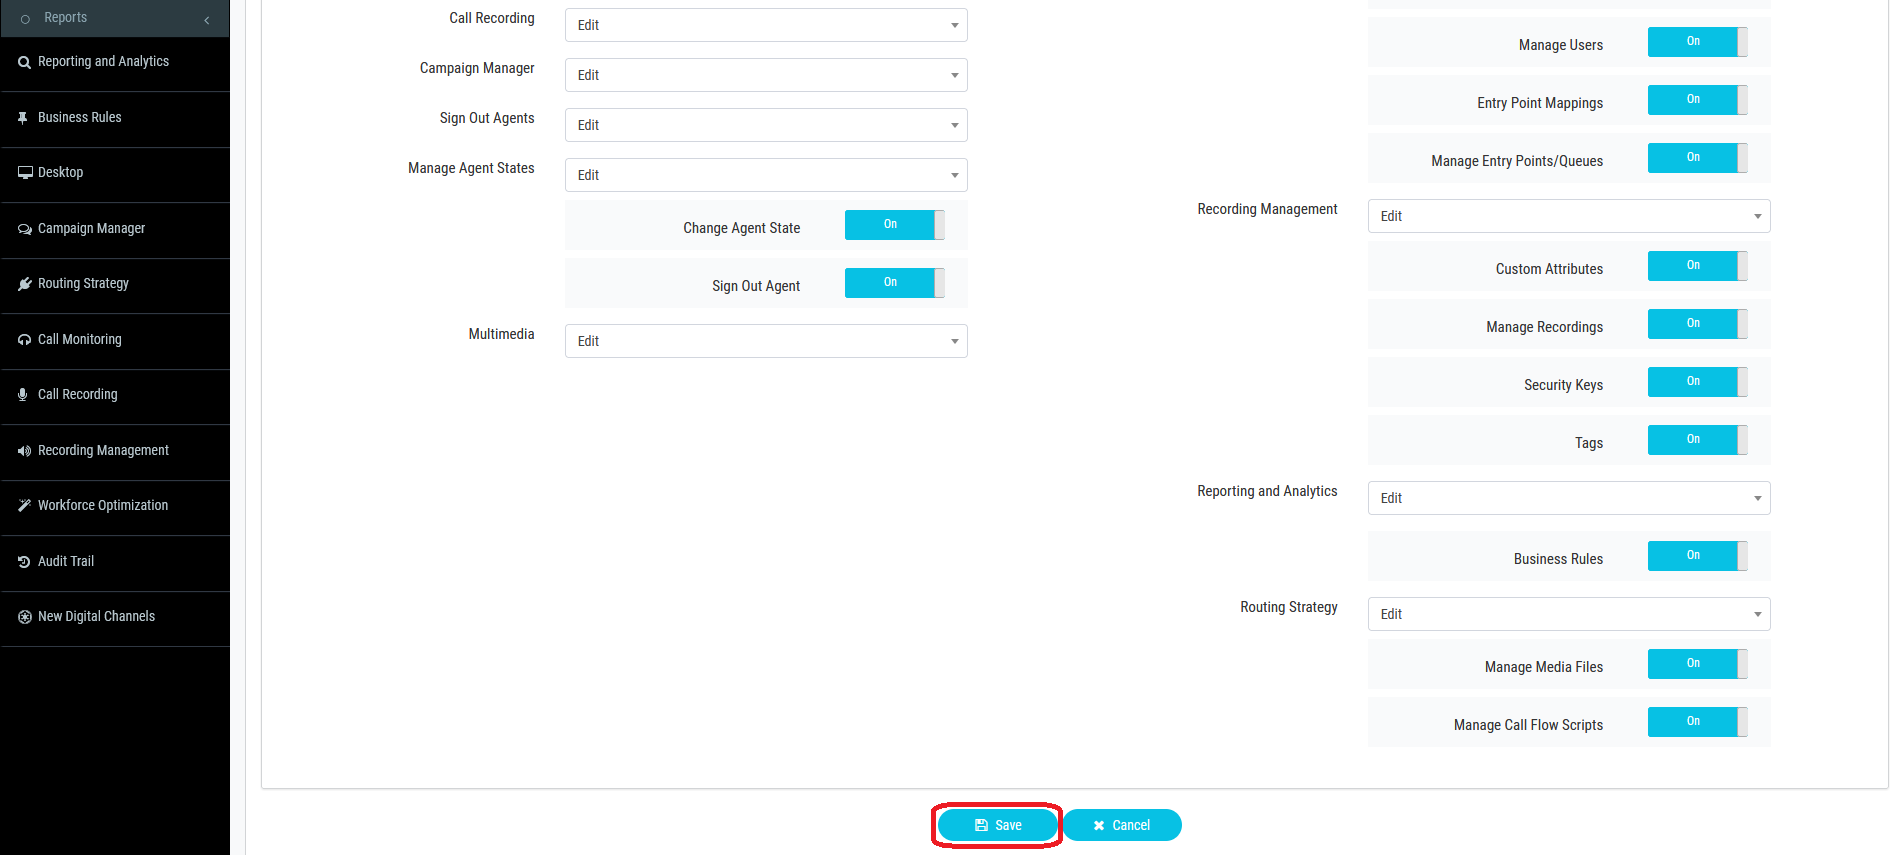
- Scroll to the bottom of the page and save the supervisor profile.
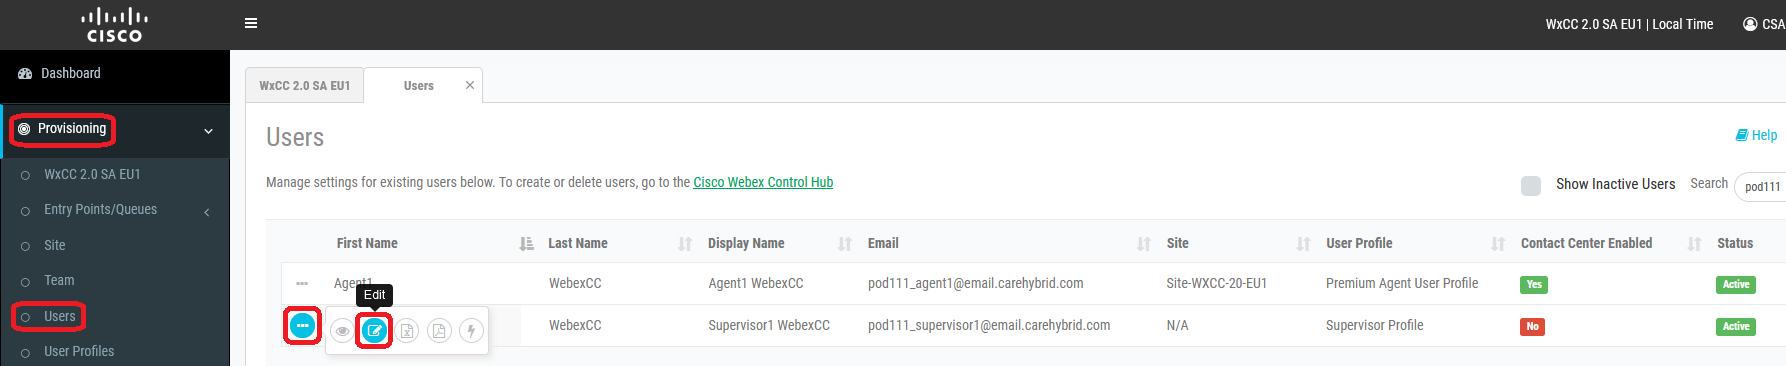
- Go to Provisioning* -> Users, find your supervisor user, click on … button next to it, then on Edit.
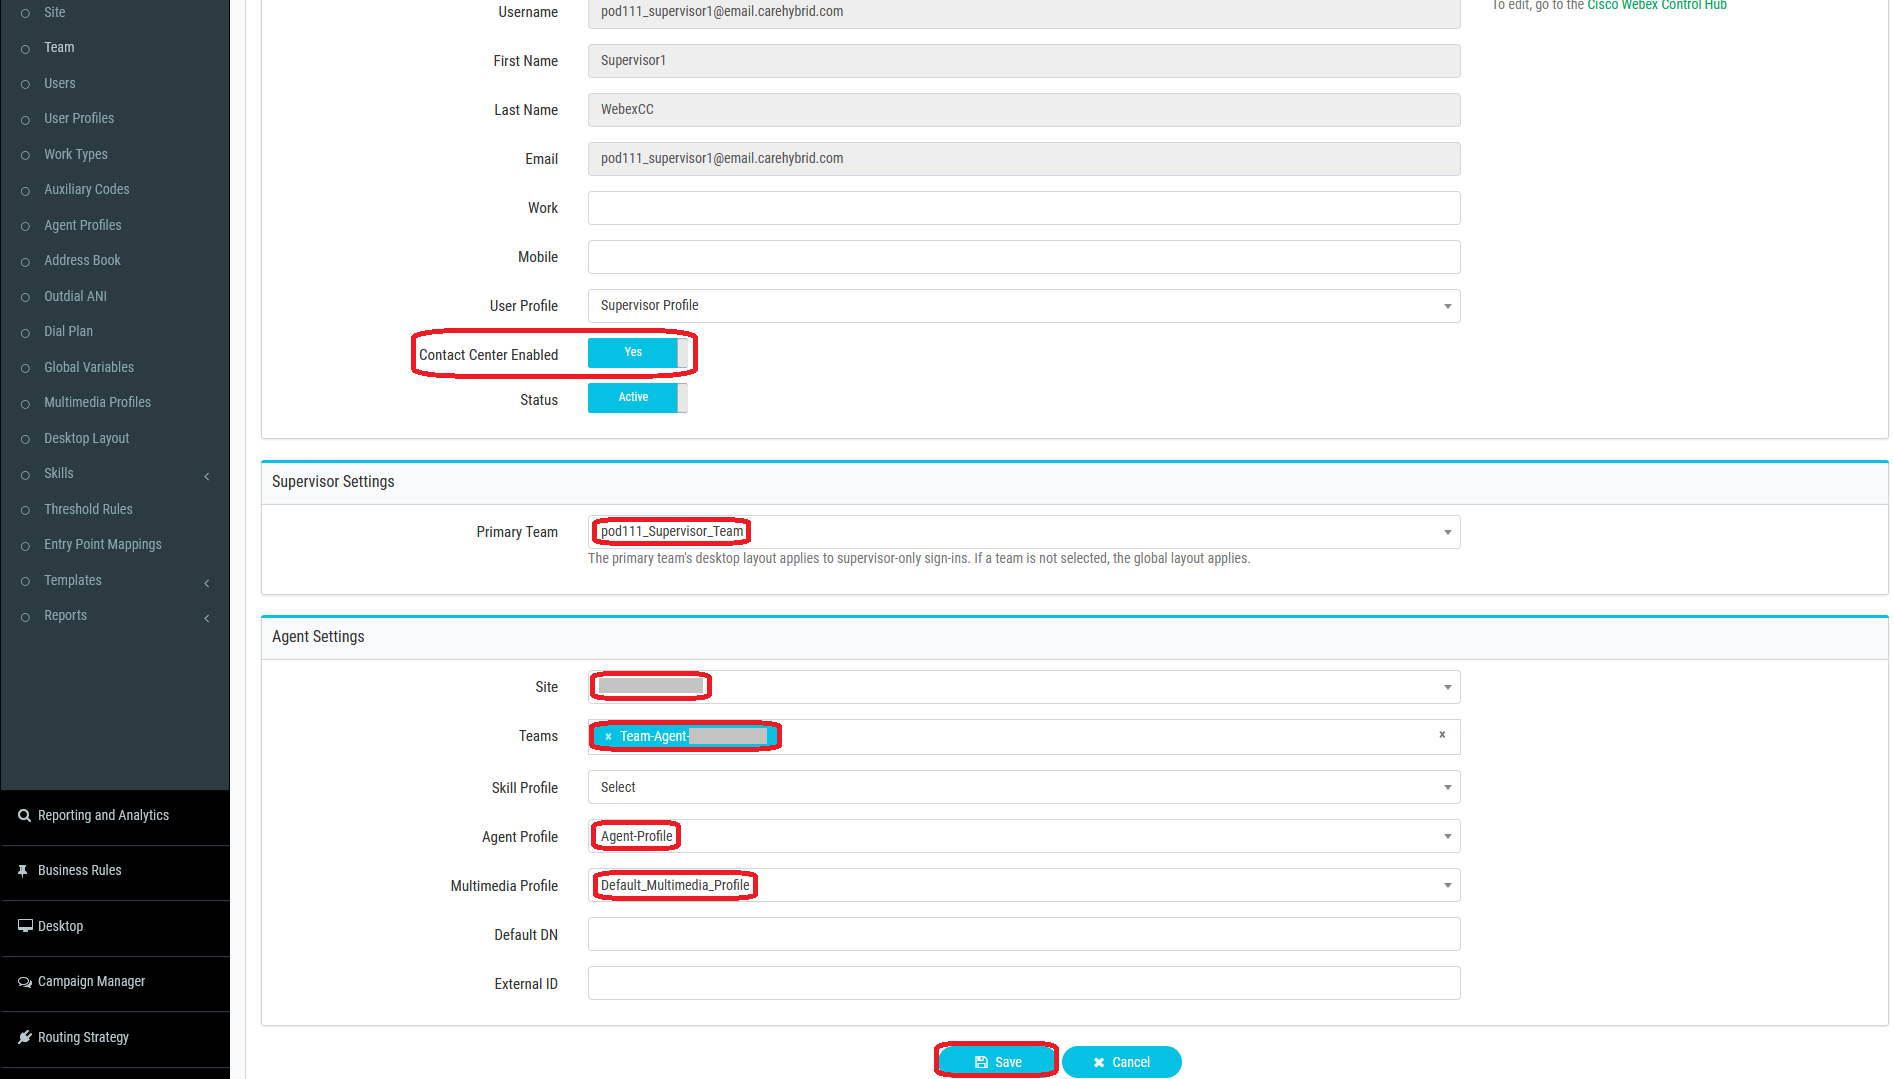
- Set the following parameters and save changes:
| Parameter Name | Parameter Value |
|---|---|
| Contact Center Enabled | Yes |
| Primary Team | Select the supervisor team created above |
| Site | Select the proper site according the to lab guide |
| Teams | Add teams that the supervisor can use when signing in as an agent |
| Agent Profile | Select the default one - Agent-Profile |
| Multimedia Profile | Select the default one - Default_Multimedia_Profile |
Supervisor Experience
In this section, you will act as a supervisor and perform activities. The Supervisor Desktop provides a holistic supervisor experience within a centralized interface. It enables supervisors to manage, monitor, assess, guide, and assist agents. It also enables administrators to customize the Supervisor Desktop with widgets to address specific Contact Center business needs
Pre-requisite
- A supervisor user configured as described above
- One agent logged in and in conversation with a customer so you can monitor the call.
Supervisor Log in
-
Sign in to the Supervisor Desktop: https://desktop.wxcc-us1.cisco.com with your supervisor credentials.
-
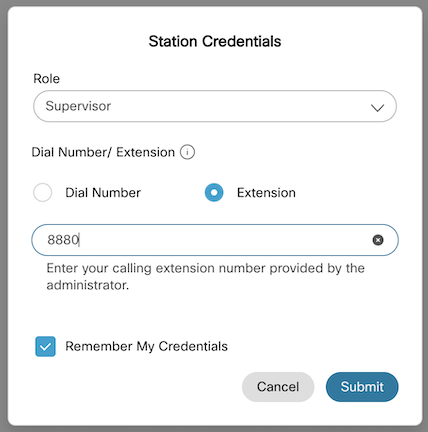
In the next window, set your role as supervisor and your own extension. Please note that you can set your role either as supervisor or agent and supervisor. We will select this second option at the end of this lab.
- When you sign in to the Supervisor Desktop, the appearance depends on how the Webex Contact Center administrator has configured the desktop layout. The Supervisor Desktop display size must be greater than 500 x 500 pixels (width x height). You must set your web browser zoom to 100% for the best experience with the Supervisor Desktop. With this lab layout you get :
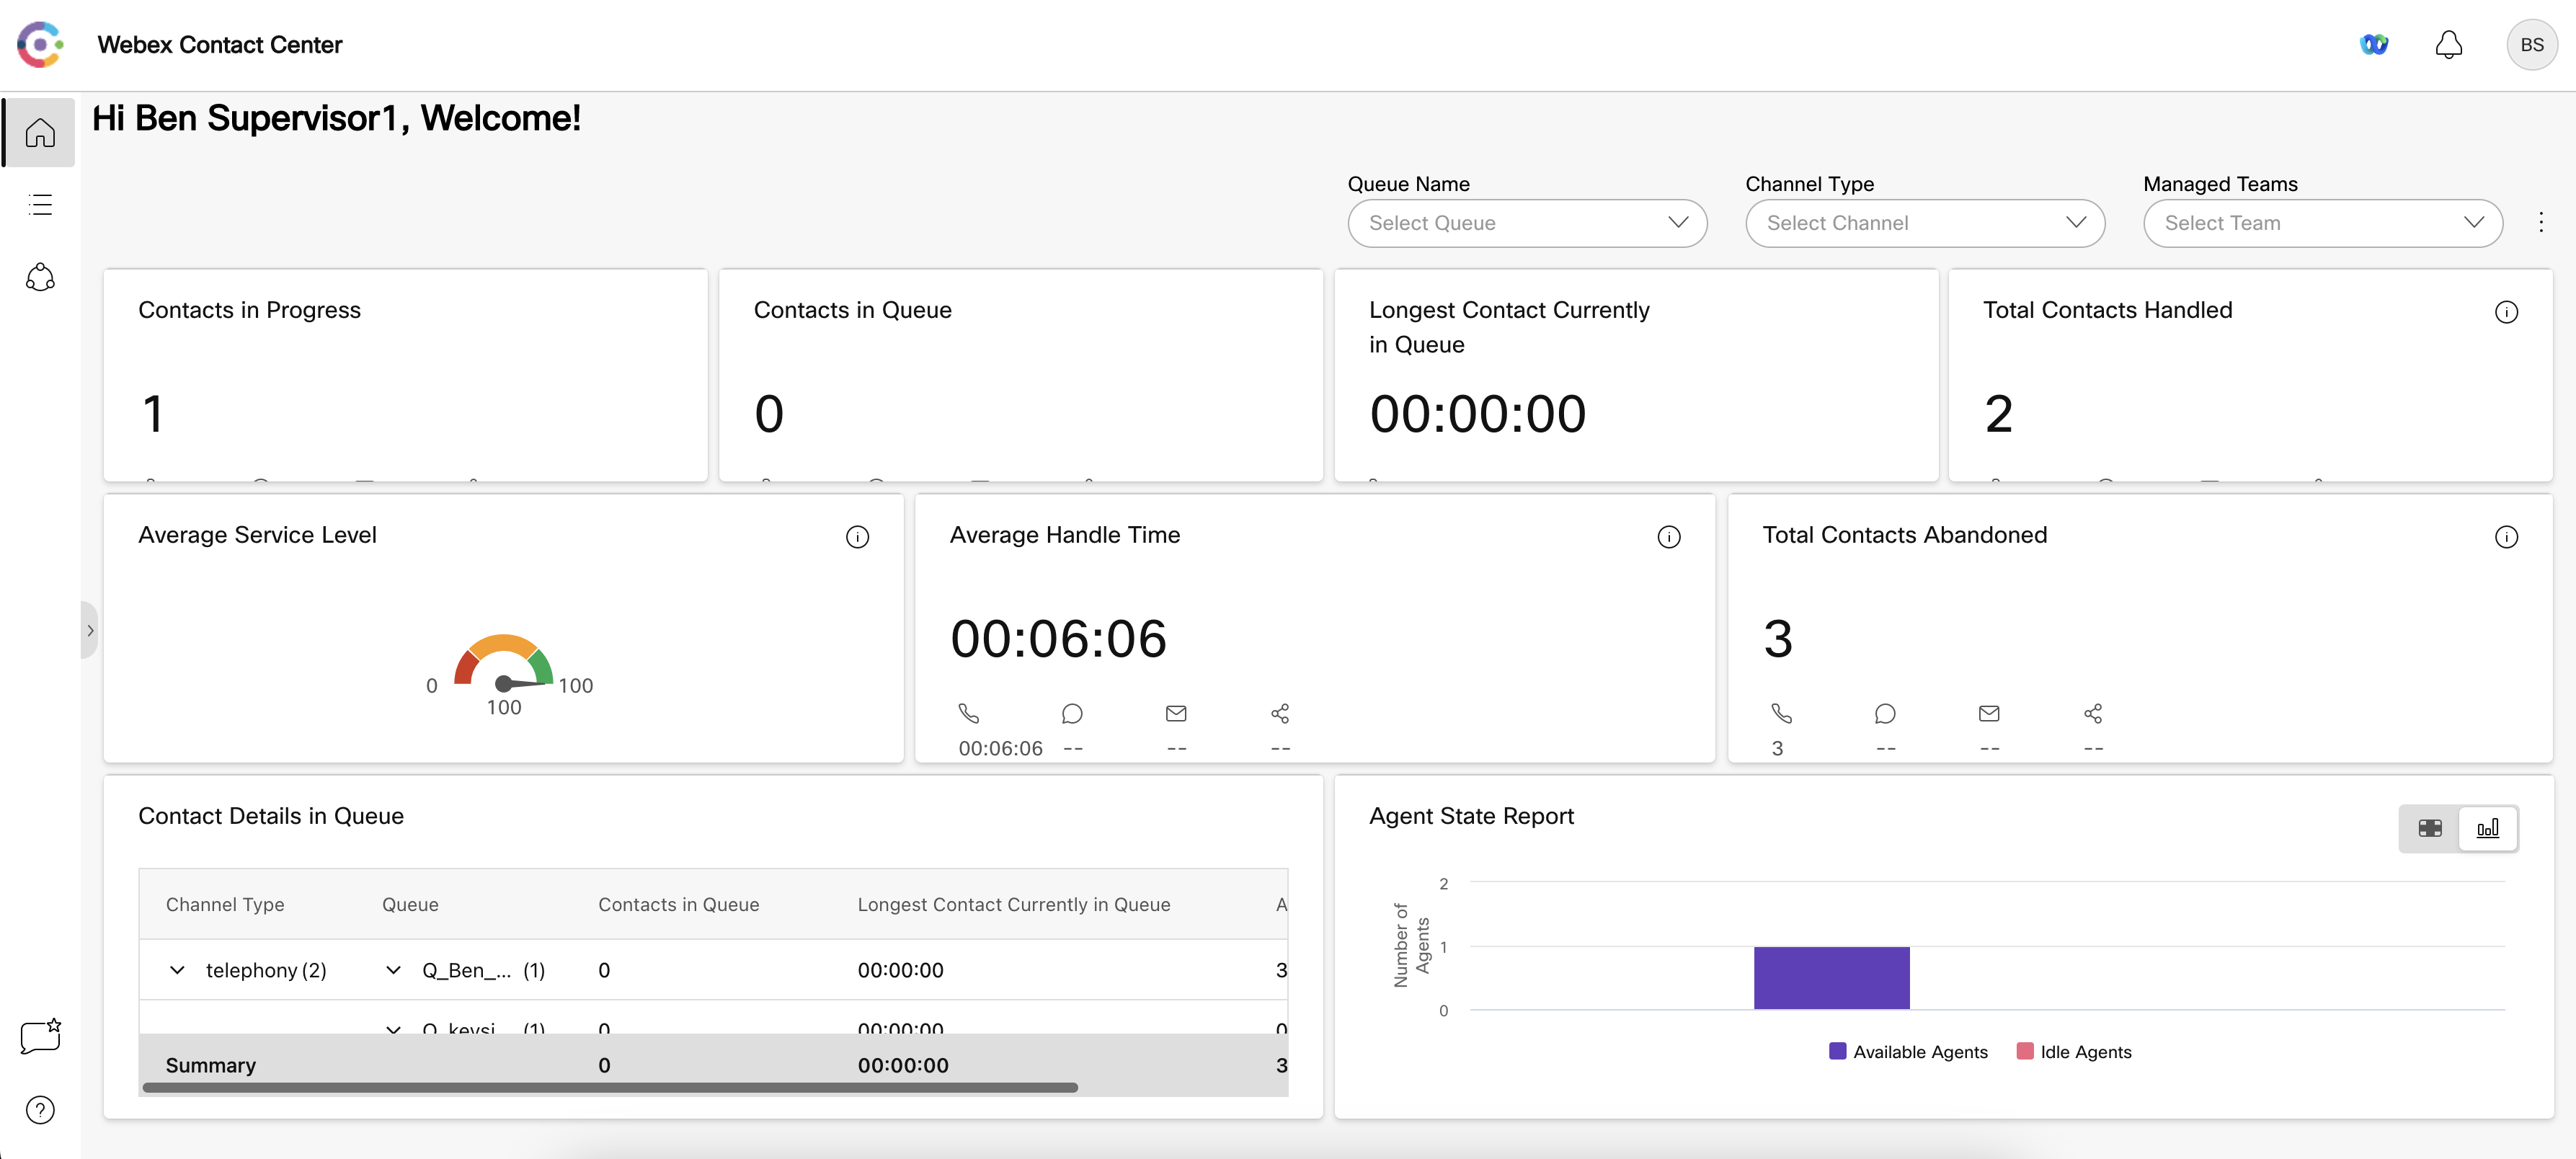
- Home Page: Displays a user-friendly interface that provides a consolidated view of key contact center metrics and filters. This is the default landing page in the Supervisor Desktop. The administrator can customize the Home Page in the layout JSON file.
- Task: Displays all the tasks when you sign in to the Desktop in a dual role (supervisor and agent) or as a supervisor, interactions such as voice, chat, email, and social messaging conversations, along with monitoring. The icon displays a badge indicating the number of requests that you have not accepted across various channels.
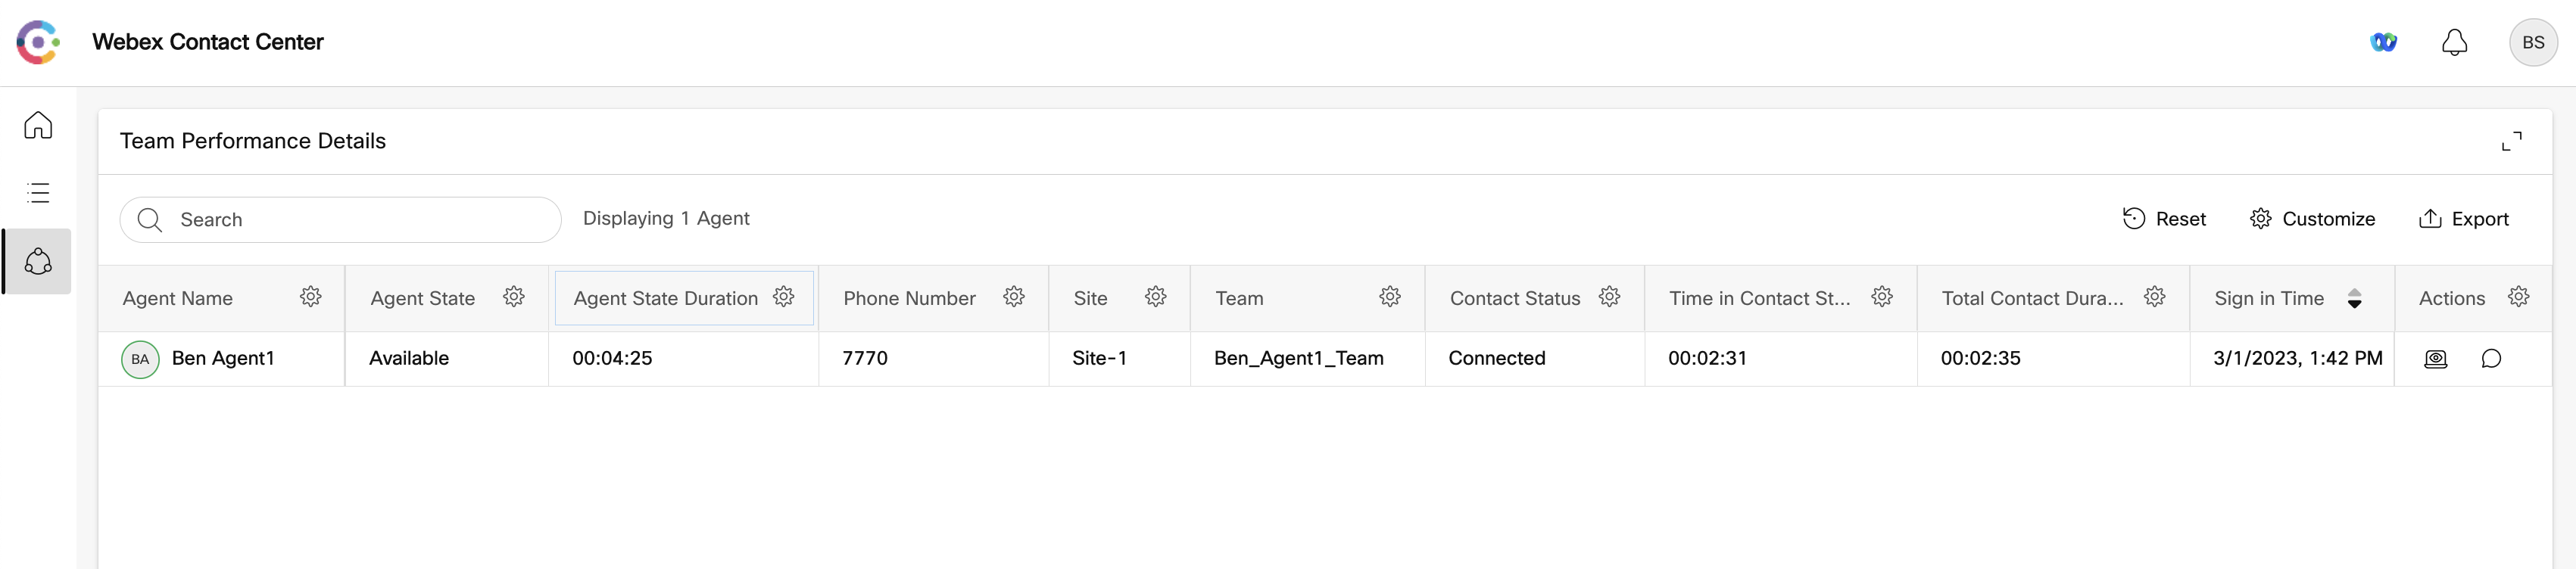
- Team Performance: Displays real-time information about an agent and a consolidated view of an agent’s performance as part of the team. You can also monitor and send 1:1 messages to an agent.
Note the Supervisor Desktop UI supports localization in 30 languages. The following are the supported languages: Bulgarian, Catalan, Chinese (China), Chinese (Taiwan), Croatian, Czech, Danish, Dutch, English (UK), English (US), Finnish, French, German, Hungarian, Italian, Japanese, Korean, Norwegian, Polish, Portuguese (Brazil), Portuguese (Portugal), Romanian, Russian, Serbian, Slovak, Slovenian, Spanish, Swedish, Turkish, and Ukrainian. The Supervisor Desktop UI language is based on the language preference settings on your browser. For example, let us consider that you have selected the preferred language as French on the Google Chrome browser. When you launch the Supervisor Desktop in the Google Chrome browser, the Supervisor Desktop UI appears in Français (French).
- Home Page :
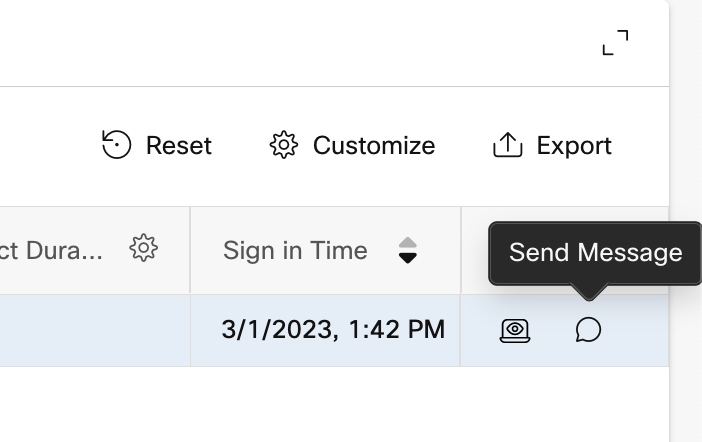
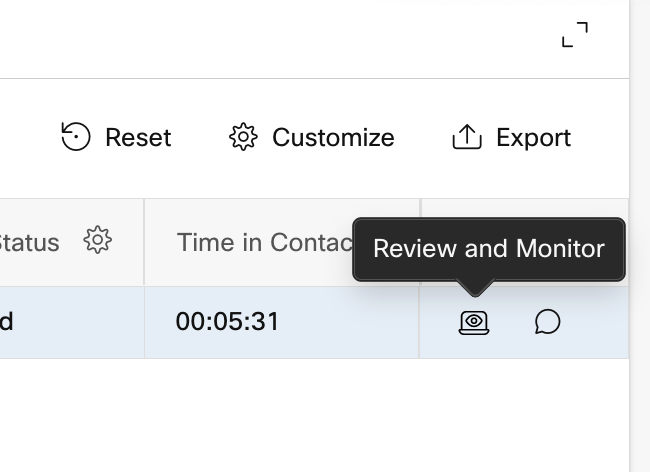
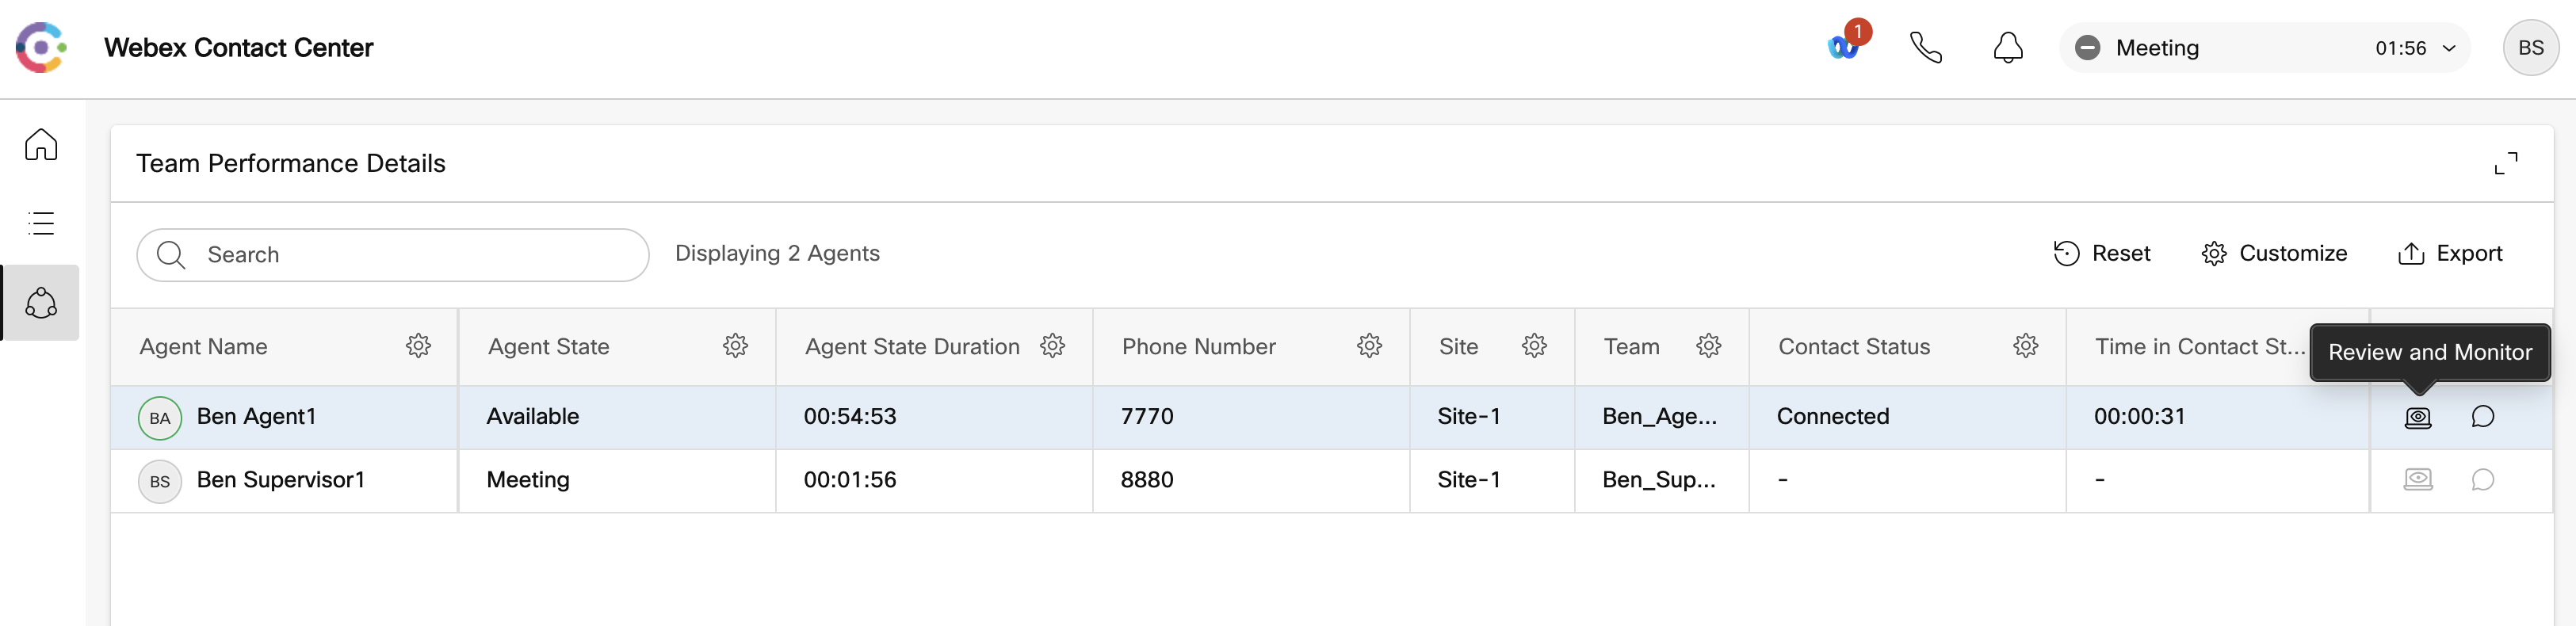
- click on the third menu option, and now you should see the Team Performance Details page where your agent’s activities are displayed: status, call duration, team, etc. In the last column, you are presented with two options: chat or monitor. The monitoring option is obviously only enabled when an agent is in conversation with a customer otherwise the icon will be greyed.
- The columns displayed are the following
| Column | Description |
|---|---|
| Agent Name | Displays name and avatar (Webex image) of the agent. |
| Agent State | The work status while using the Supervisor Desktop. The agent availability state includes Available, Idle codes, or RONA. |
| Agent State Duration | The time that the agent has been in the current state. The state timer format is hh:mm:ss (for example, 01:10:25). |
| Phone Number | Dial number or extension of the agent signed in. |
| Site | Name of the site with which the agent is associated. |
| Team | Name of the team with which the agent is associated. |
| Channels | The mode of communication through which an agent can communicate. For example, voice calls. |
| Contact Queue | Name of the queue from where the agent receives the incoming call. |
| Contact Status | The status of the agent in an active call. Example: Connected, Consulting, Conference, or Wrap up |
| Time in Contact Status | The time spent by an agent in an active call. For example, the time an agent is in a conference call. |
| Total Contact Duration | Total duration of the contact from when it was first connected (including any other state like consult or conference in the same contact). The time elapsed since the agent accepted the request. The connected timer format is hh:mm:ss (for example, 01:10:25). |
| Sign In Time | The time an agent has signed in to the Supervisor Desktop. The date and time format is dynamic and displays according to location. |
| Action | You can perform the following actions:• Review and Monitor - Based on the privilege provided by Administrator as part of user profile, you can review and monitor an ongoing agent call silently. • Send1:1 message to Agent – Based on the privilege provided by Administrator as part of a user profile, you can send a 1:1 message to an agent. |
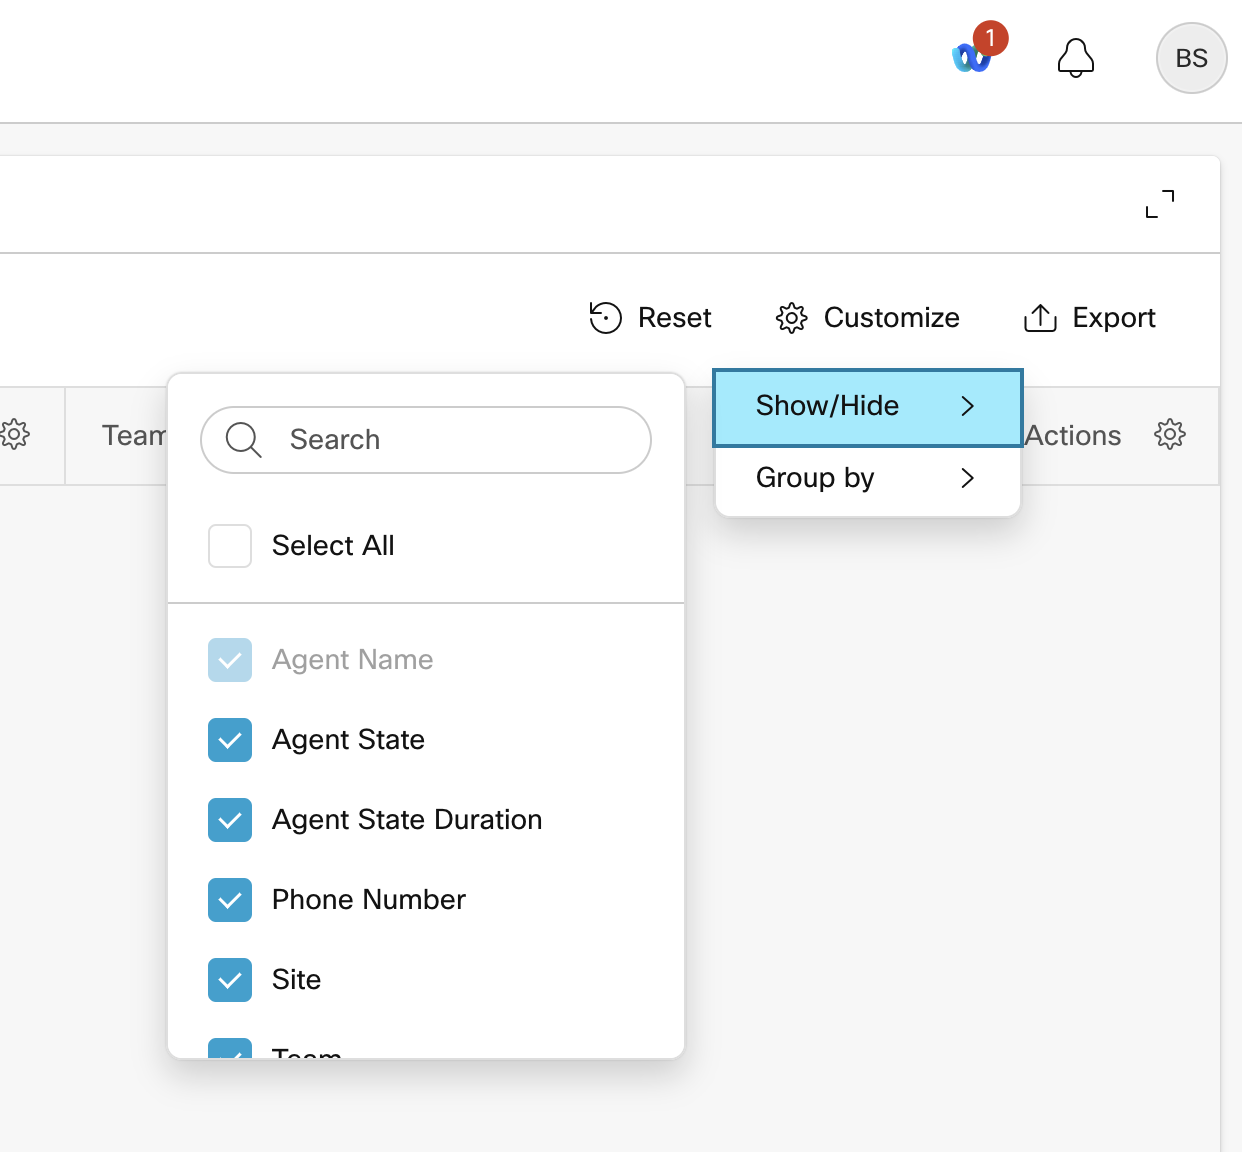
- you can customize this view to show/hide columns or group information at your convenience.
Chat with your agents
Collaboration between agents and supervisors can help your Contact Center to be more effective and efficient for your customers and this is why we have enabled Webex messaging features in both Agent and Supervisor desktops.
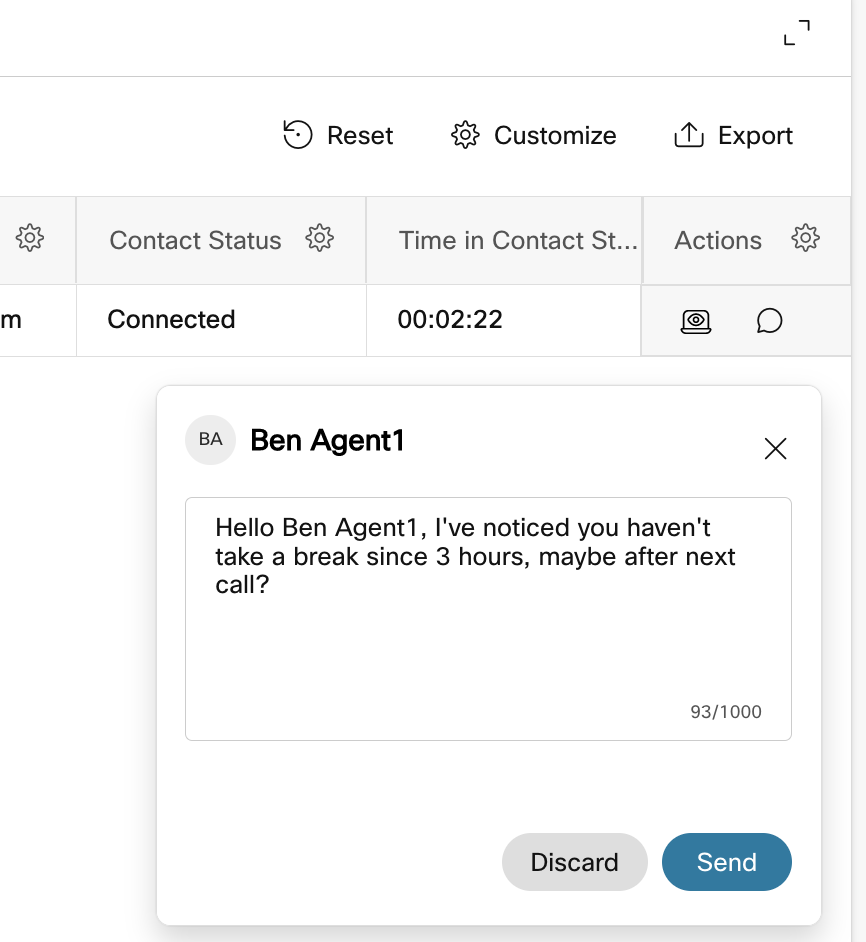
- Click on the Send Message button
- Fill the chat window with a message to send to your agent
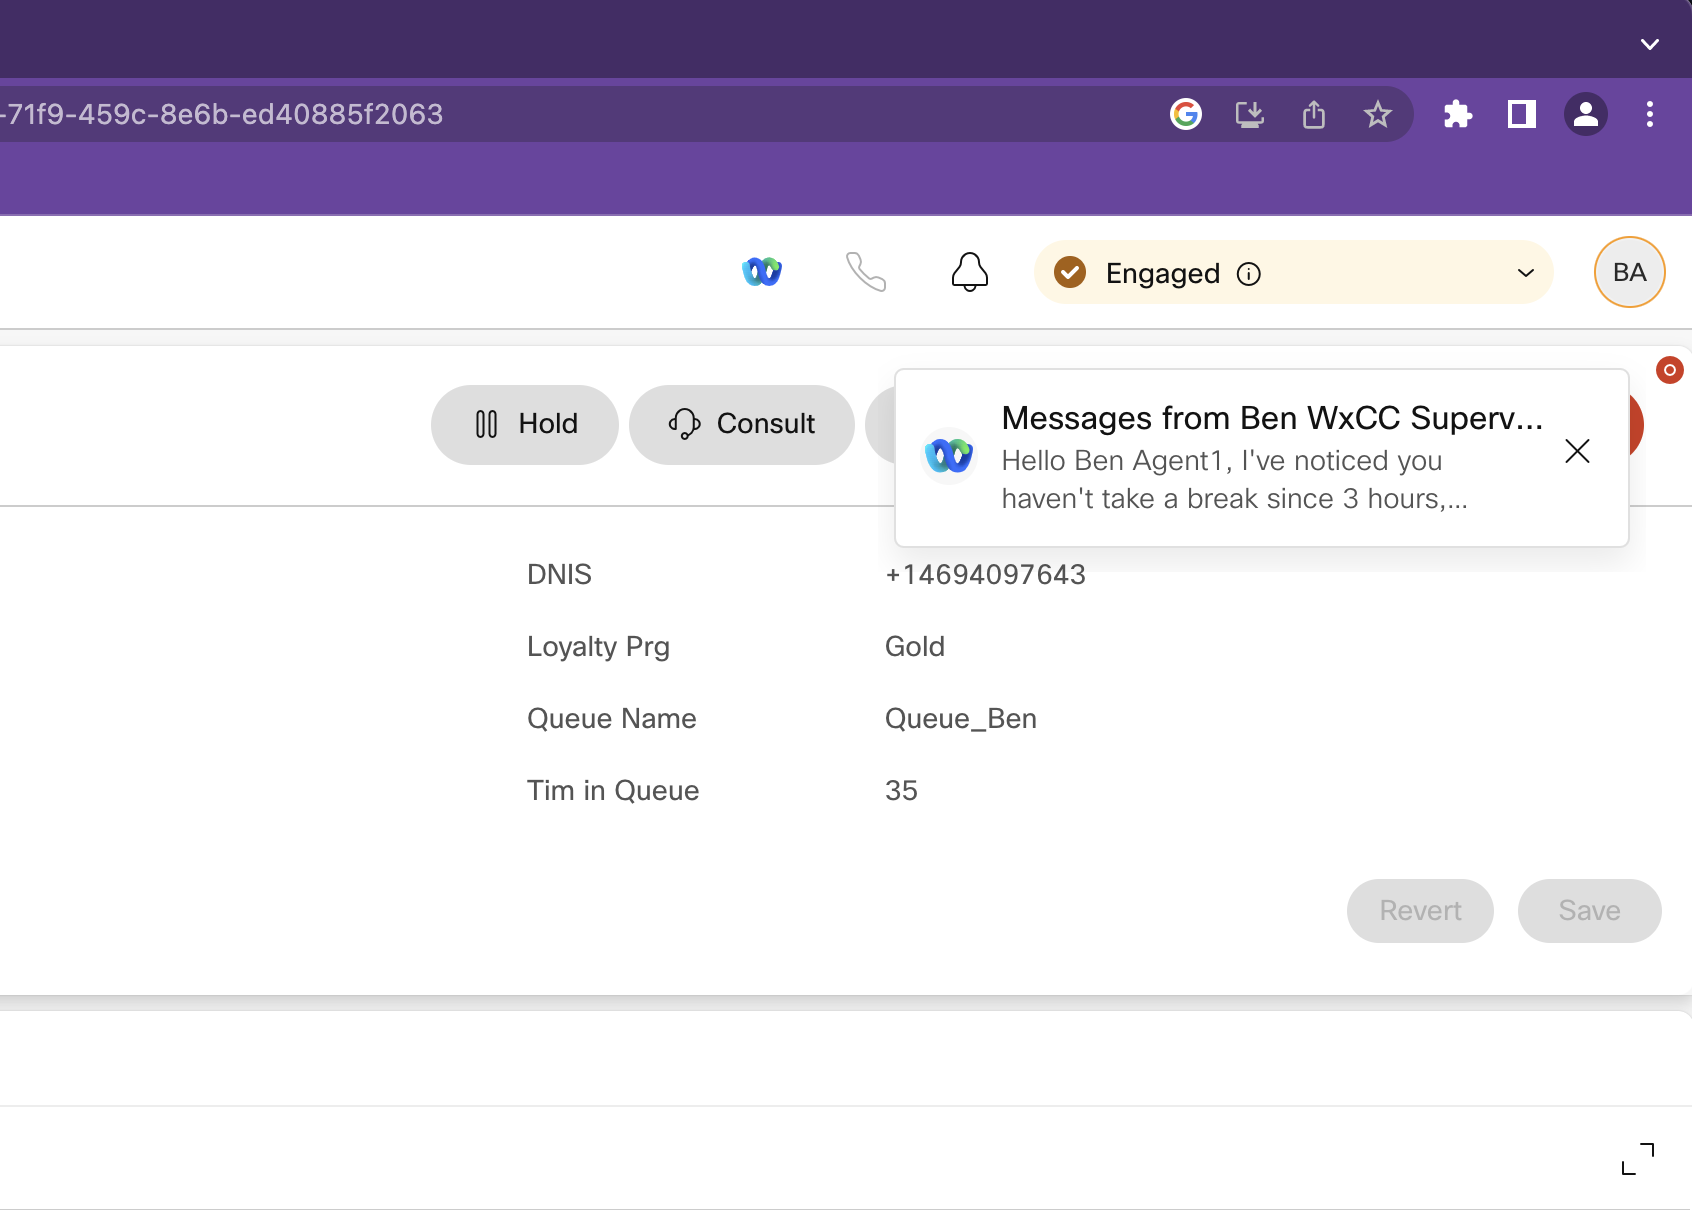
- On the agent side, observe the message notification received
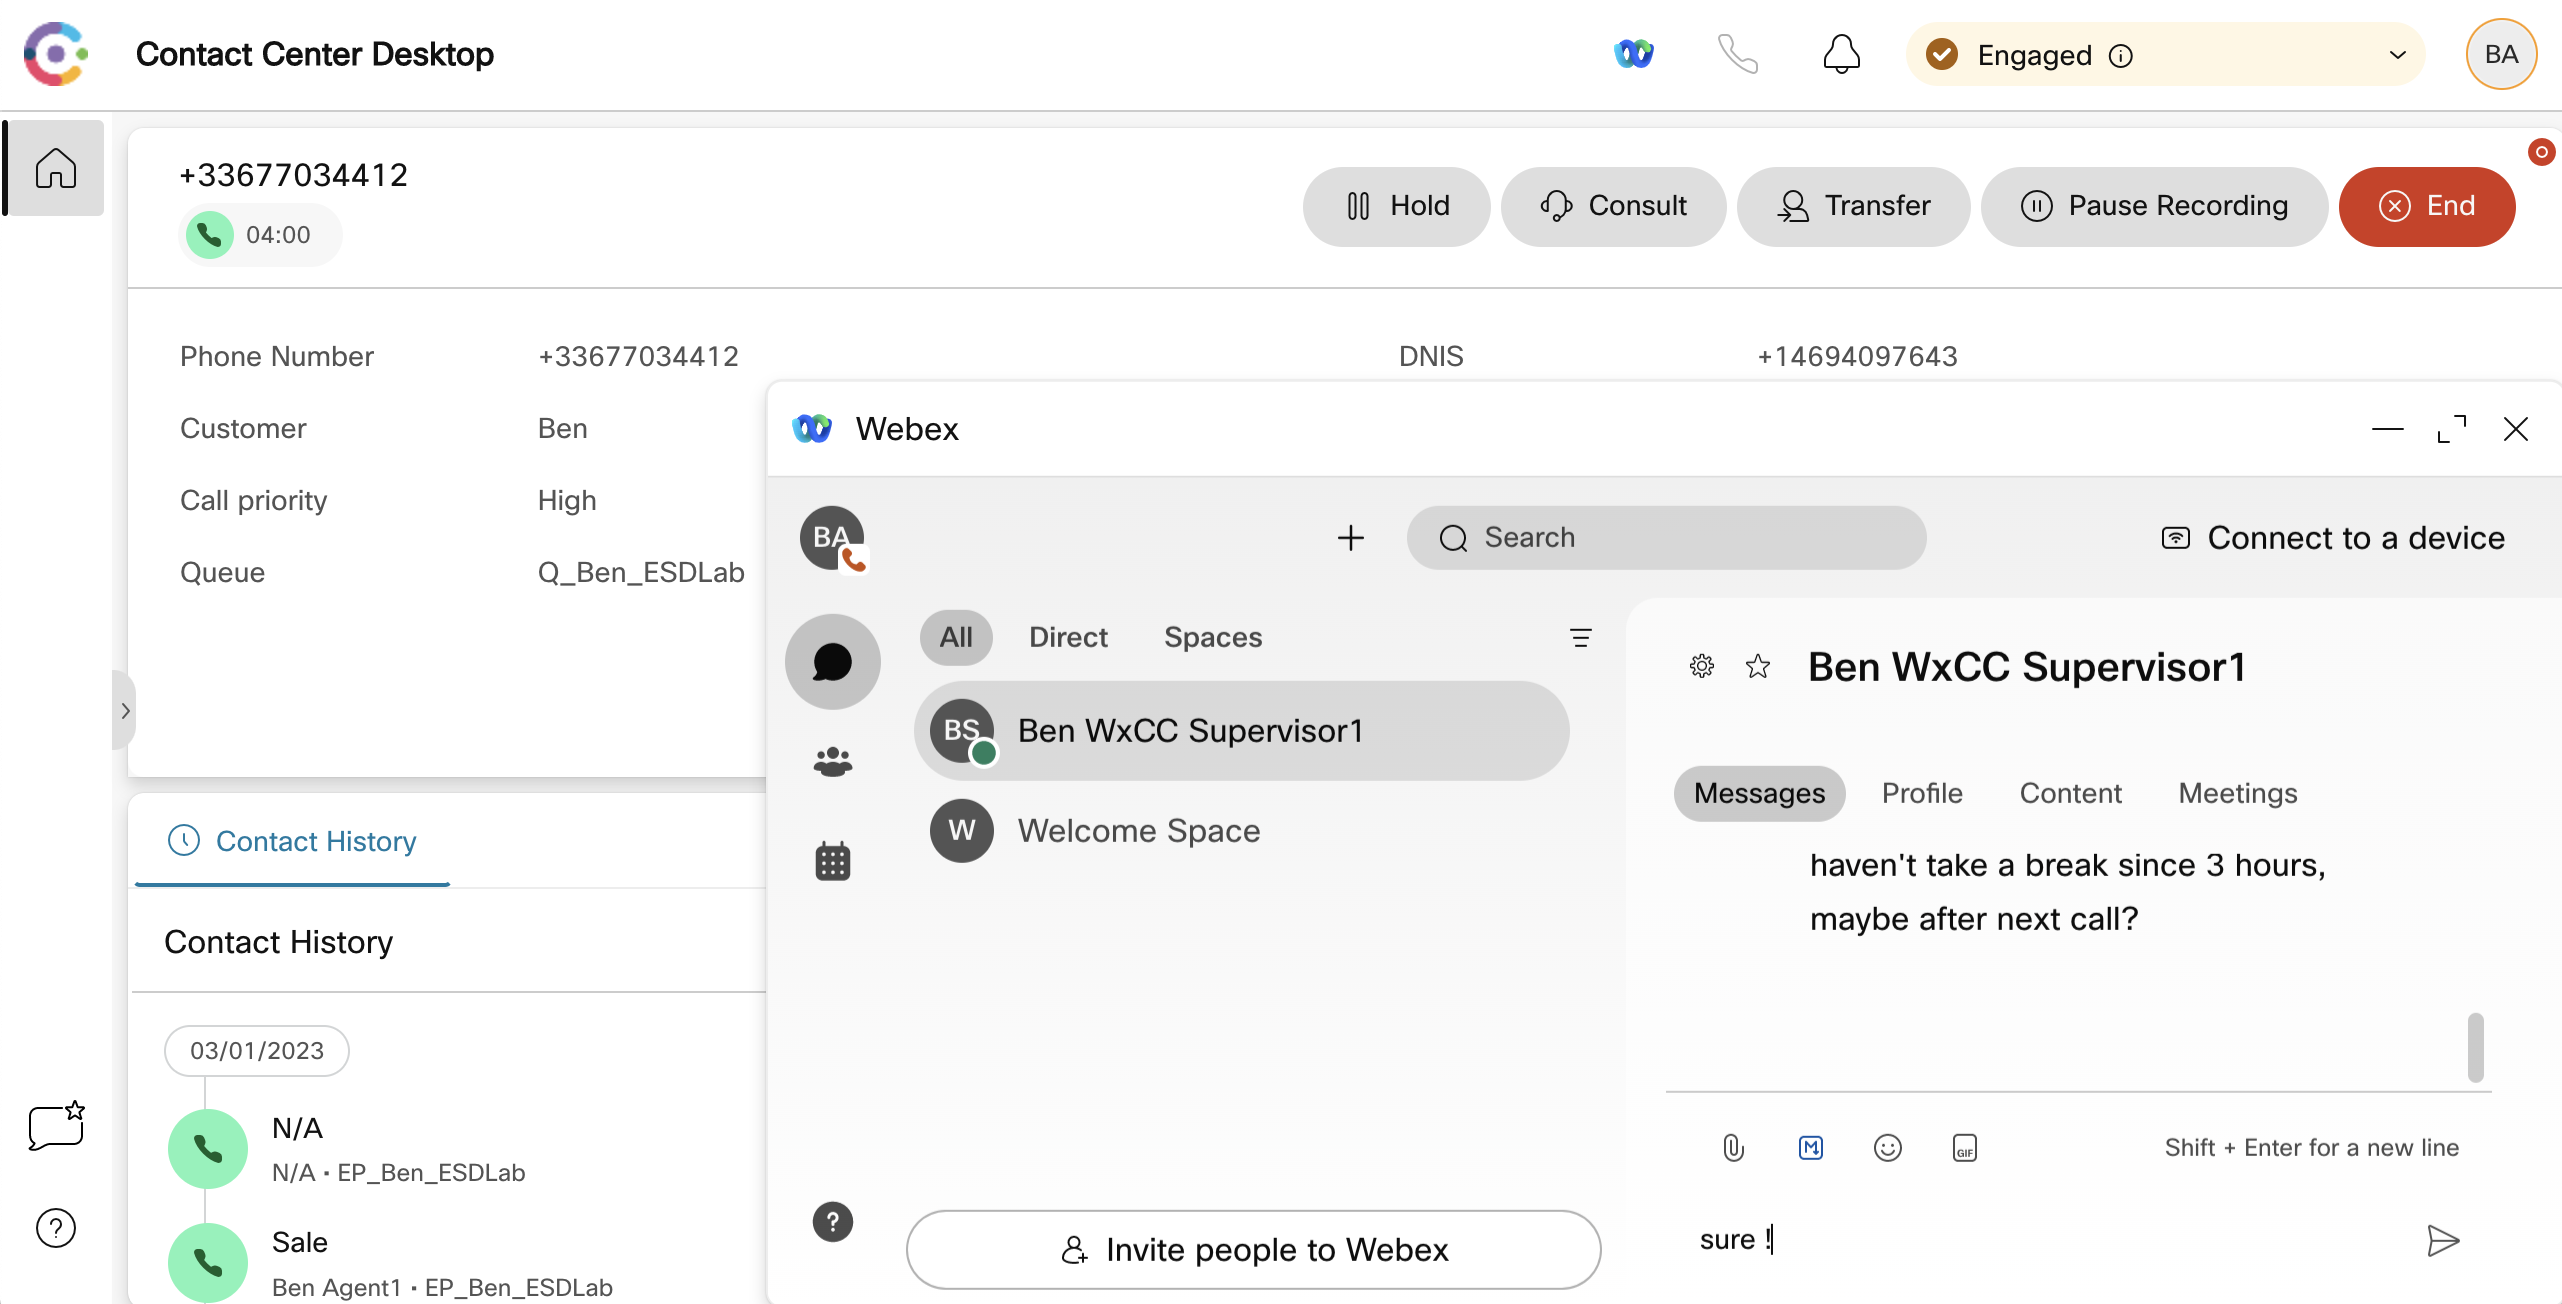
- If, as an agent, you want to answer to the supervisor, your will need to click on the Webex logo to open the Webex app embedded in the Agent Desktop. You can then reply to the supervisor directly.
- On the supervisor side, observe the message notification received

Monitor calls
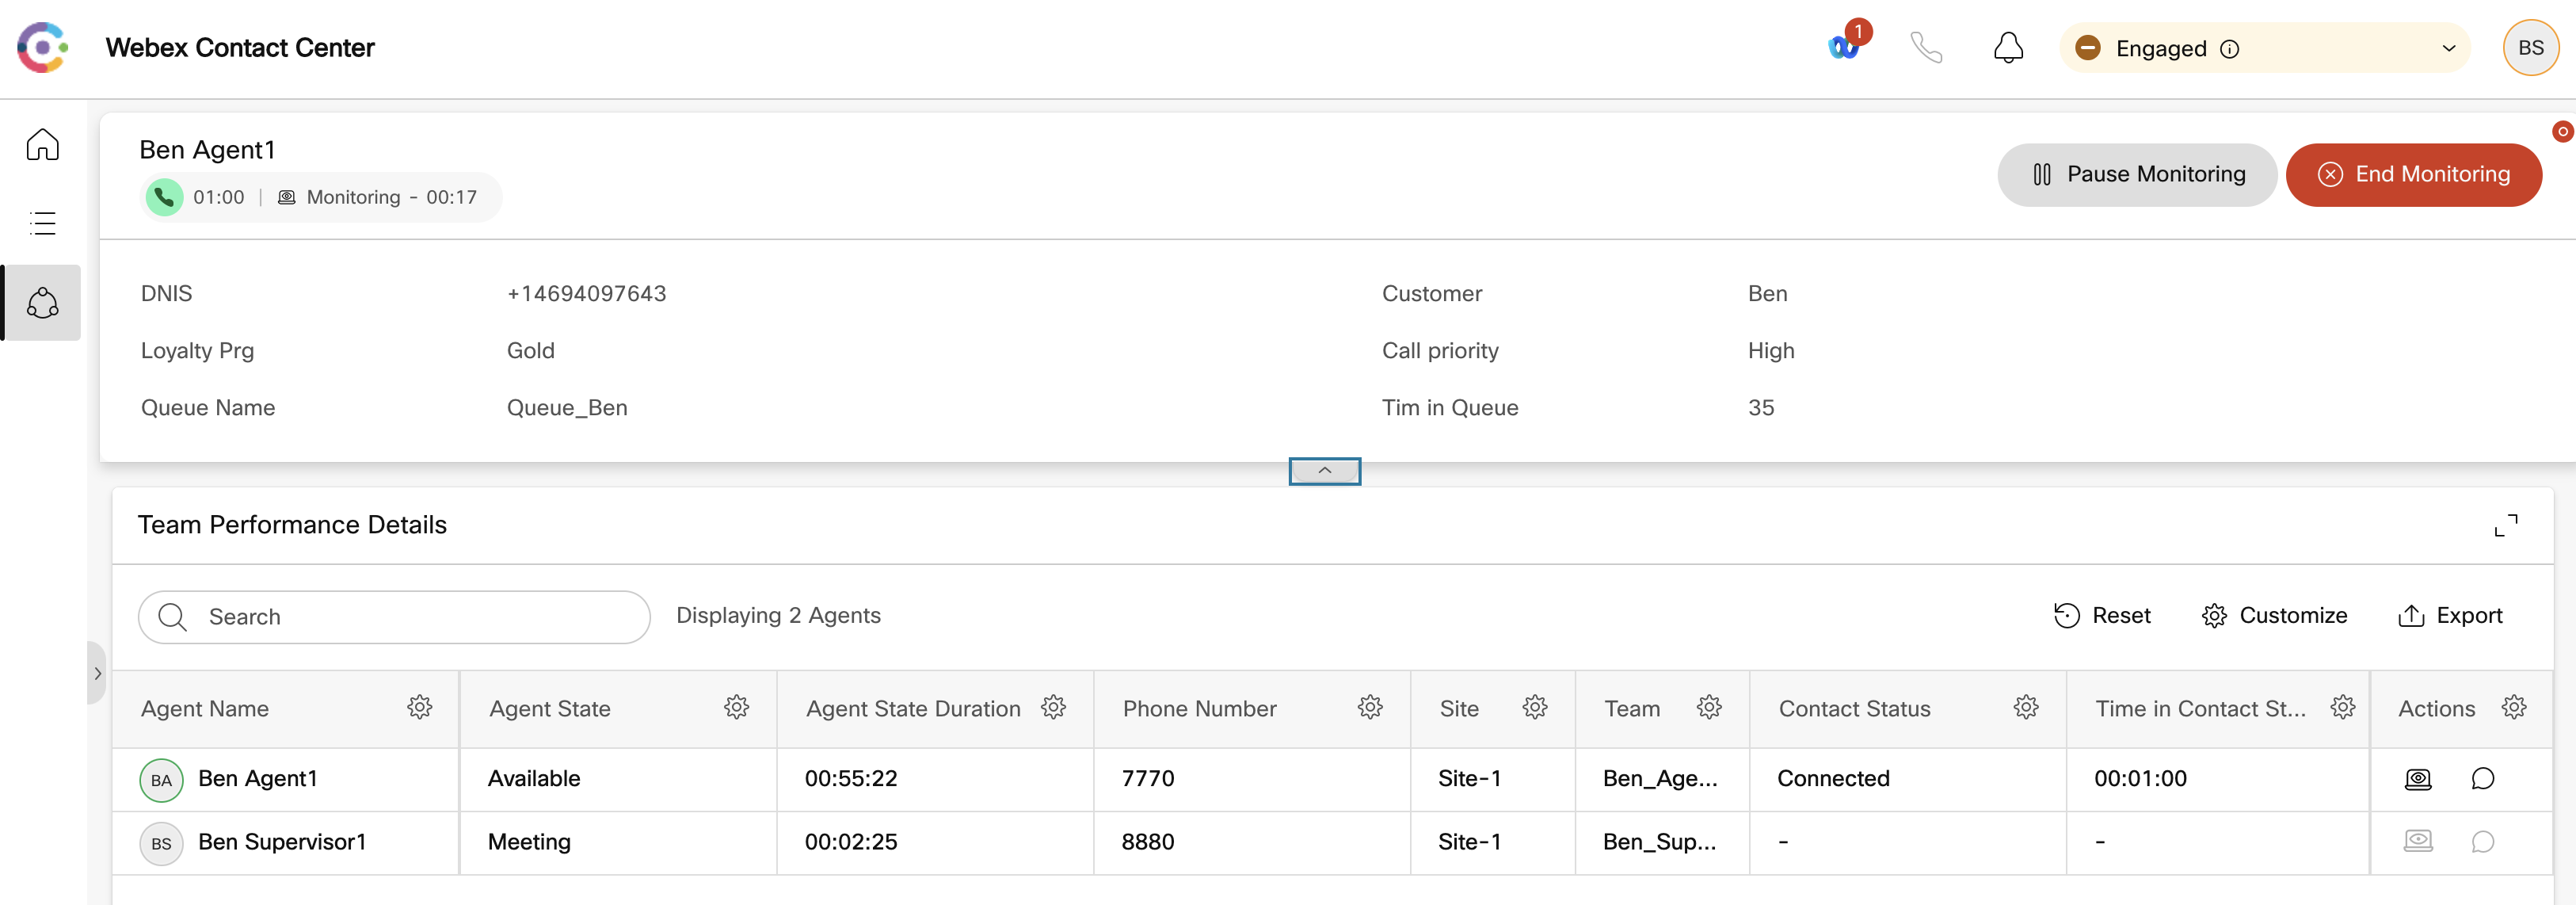
- As a supervisor, the Team Performance Details page allows you to see all connected agents and decide to monitor calls by clicking on the Review and Monitor icon.
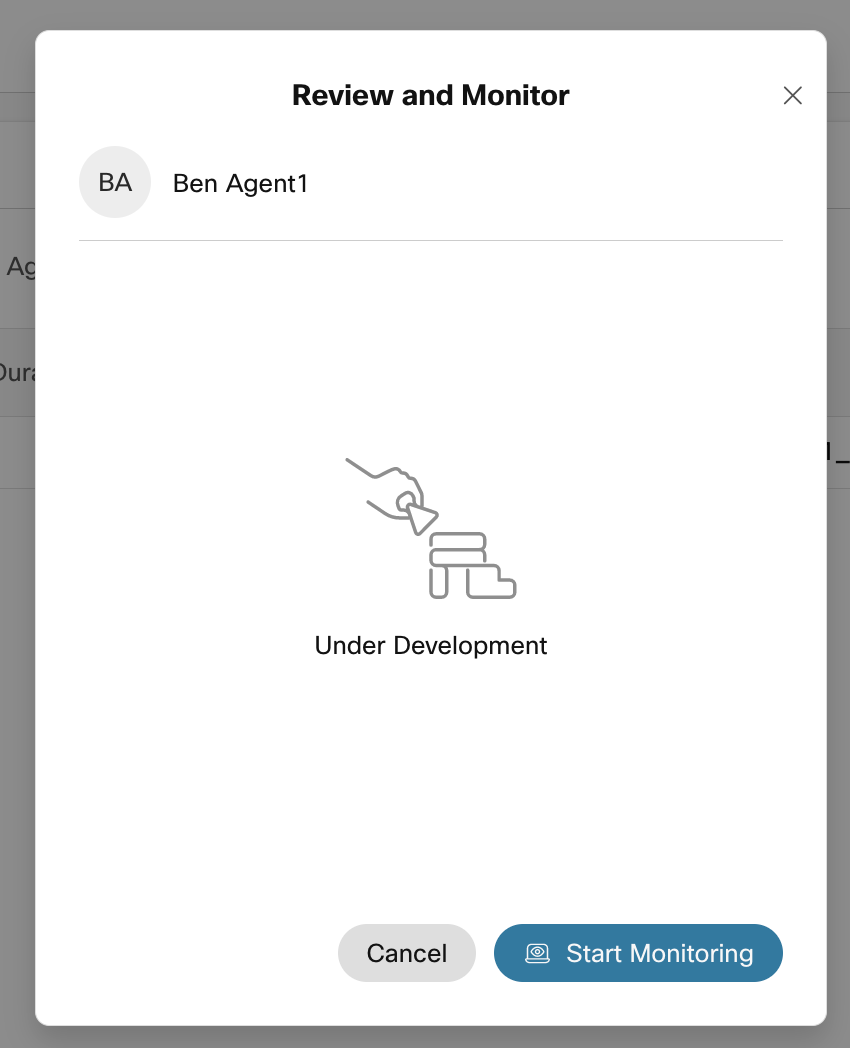
- The following popup will be displayed. Click on Start Monitoring. Please note a supervisor can monitor other call types such as callbacks, outdial calls, outbound preview campaign calls.
- In your Supervisor Desktop, an incoming popover window will be displayed and your softphone will ring as Webex Contact Center is now trying to reach you. You recognize the agent you want to monitor and other call variables are displayed. The Flow configuration defines variables to display on this popover (max 6). Accept the call on your supervisor softphone.

- As a supervisor, the call you are now monitoring is displayed in your desktop with agent and customer details of which the call variables so you are aware of the context of the call. You can view previous communications with a customer across all channels (voice, email, chat, and social) in the Contact History pane. The pane displays details for the last 24 hours.
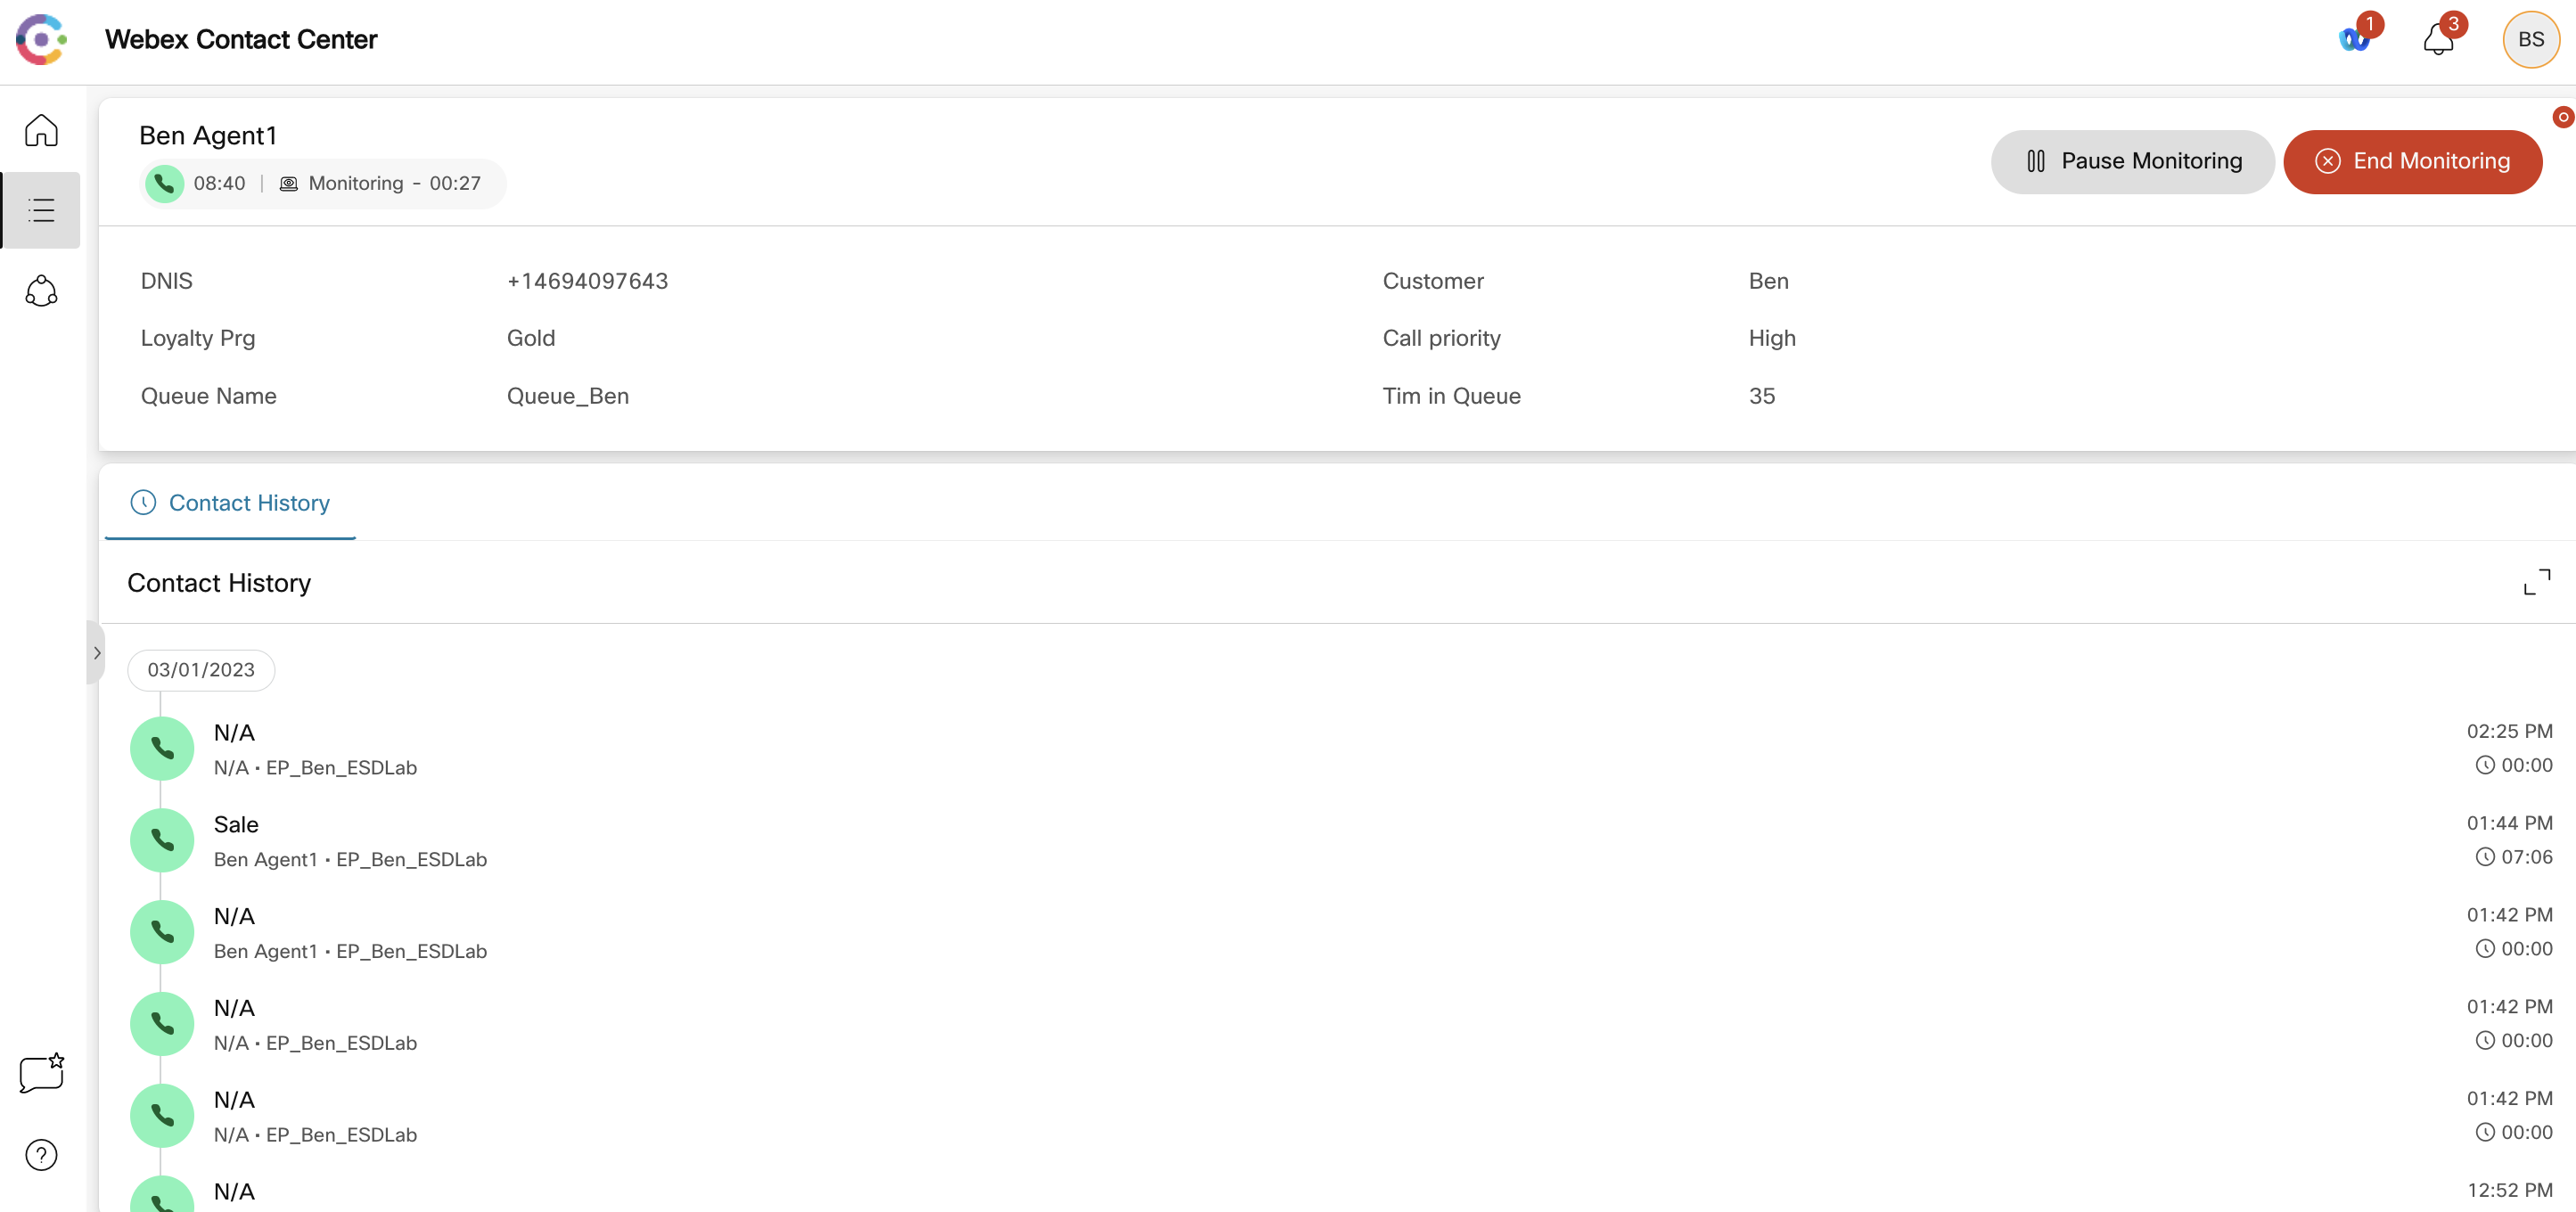
- You can pause the monitoring and start is again if you will

Particular case when a supervisor is also an agent
- When you sign in to the Supervisor Desktop, you can - depending or your team assignment - choose either the supervisor role or supervisor AND agent role.

- In this case, the supervisor experience is a bit different as your agent status appears in the header section of the Desktop.
- If, as a supervisor, you choose to monitor a call, your status is set to Engaged and you cannot take other calls as an agent.
Congratulations, you have completed this lab! You can continue with the next one.